This feature allows you to offer return and exchange services in multiple languages. By reducing misunderstandings, this feature significantly brings localized experience for your customers
How to use?
Step 1: Accessing the Language and Translation Settings
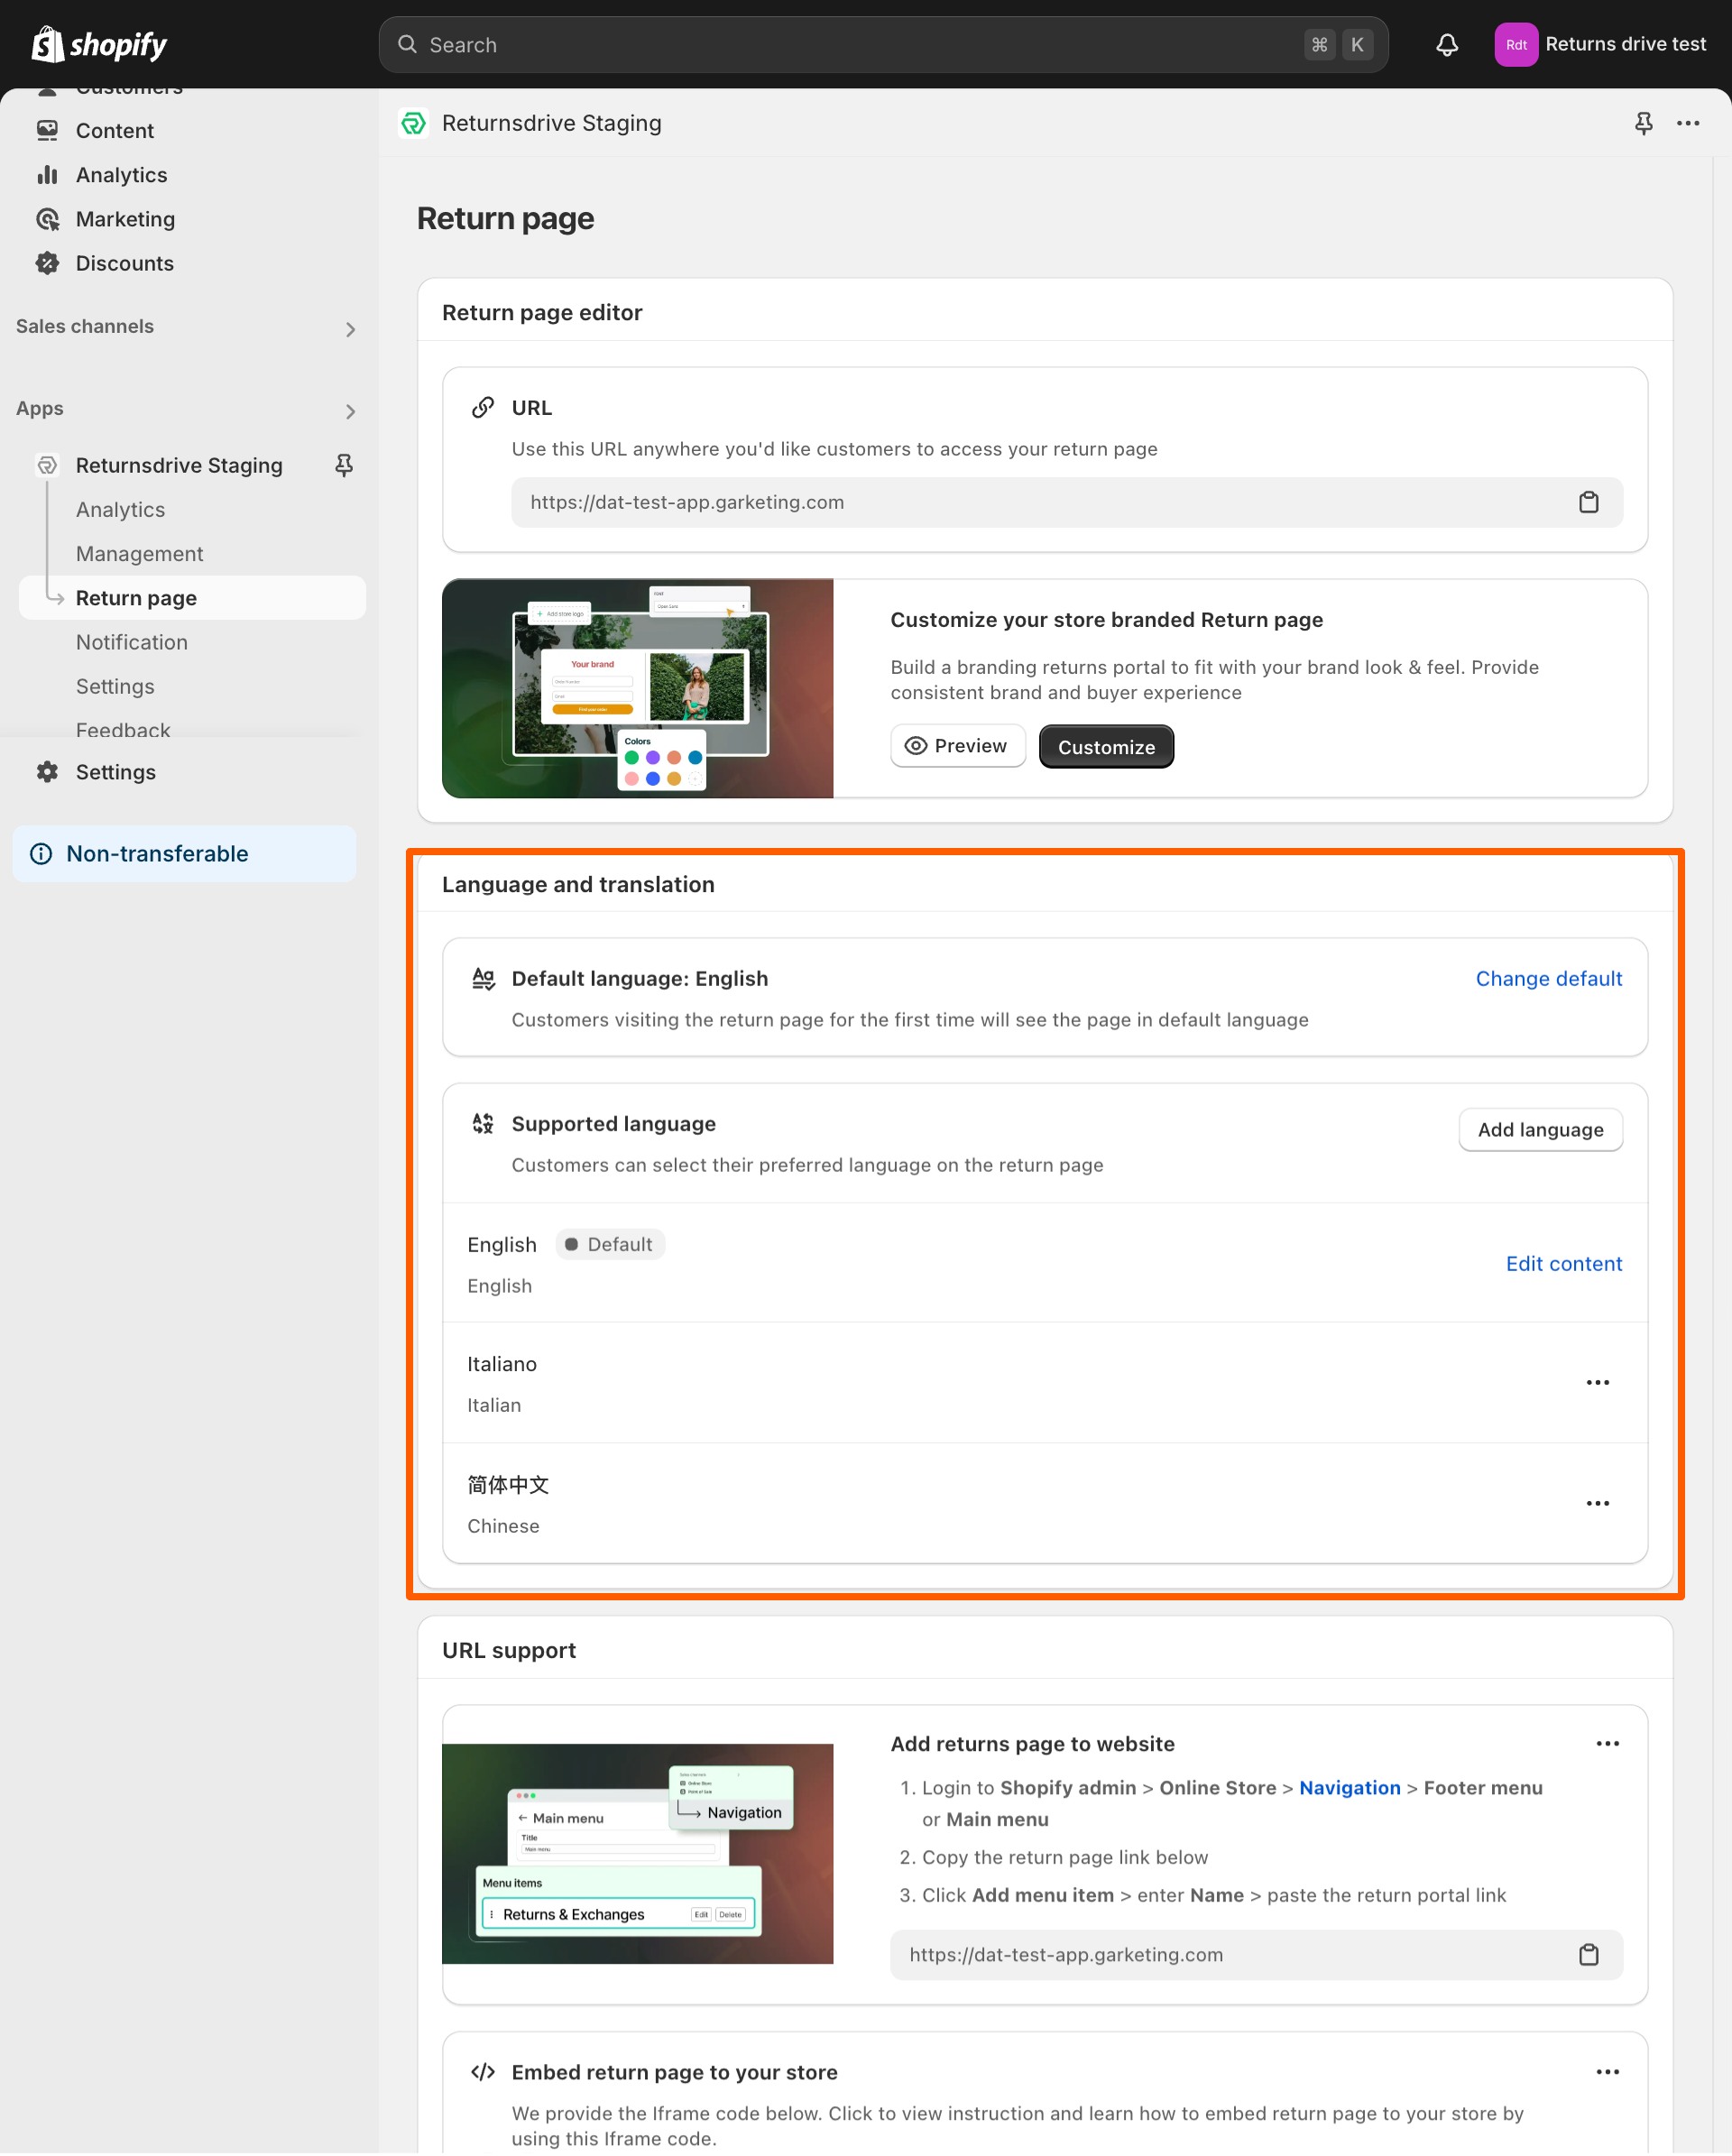
- Open the application and go to the “Return page.”
- Scroll down until you find the “Language and translation” section.
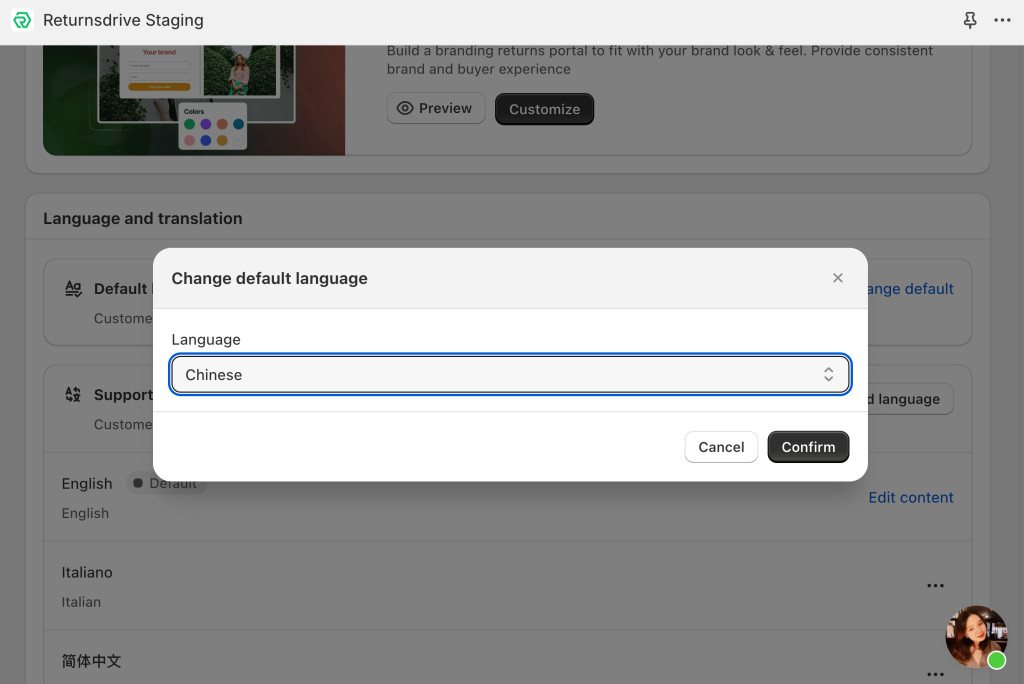
Step 2. Changing default language (Starter Plan)
For users on the Starter Plan, identify the current default language (English).
- Click to Change default
- Click on the language dropdown menu to view the available languages.
- Select the desired language from the list.
Step 3. Adding other languages and Edit content (Professional and Premium Plans)
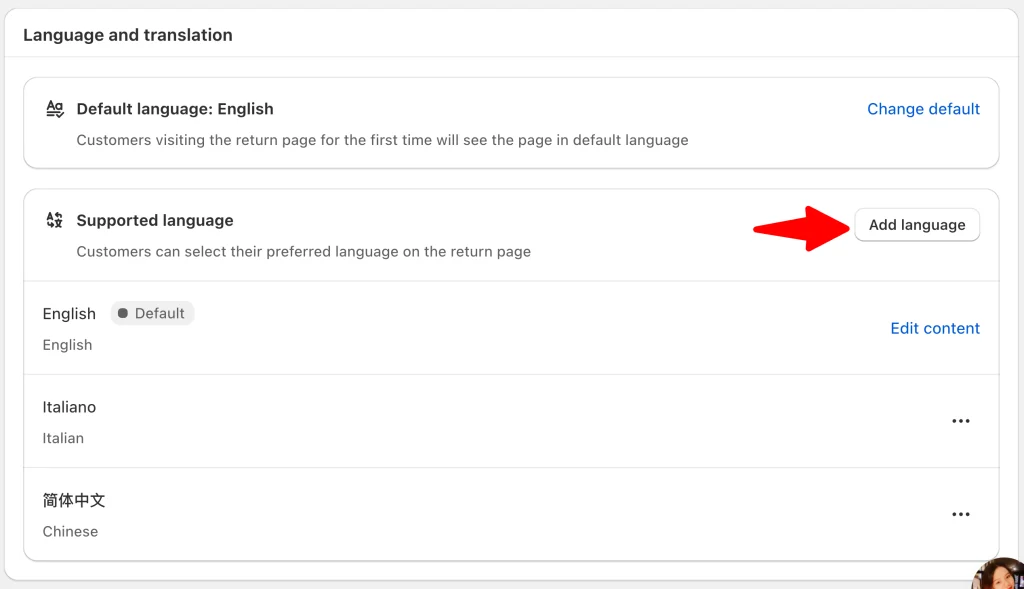
Add New Language:
For users on Professional and Premium Plans, navigate to the “Language and translation”
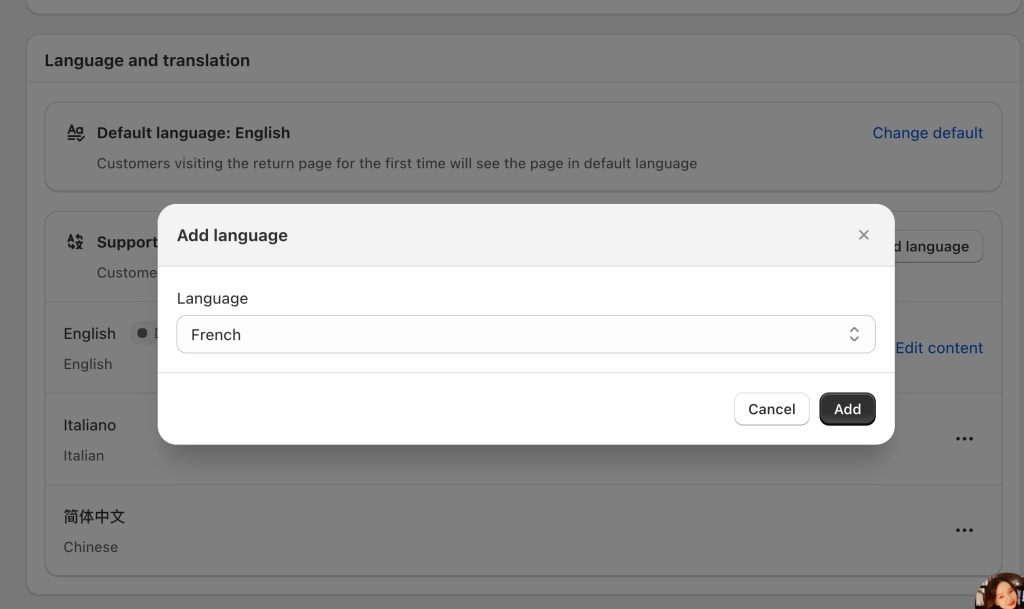
- Click the “Add Language” button to see a list of available languages.
- Select the desired languages to add to the application.
Editing Content for Language
- Click the “Edit content” button to enter the content editing interface.
- Choose the section you wish to edit from the list of options:
- Login page
- Request action
- Stepper
- Return request
- Exchange request
- History page
- Return method
- Refund resolution
- Exchange resolution
- Error message
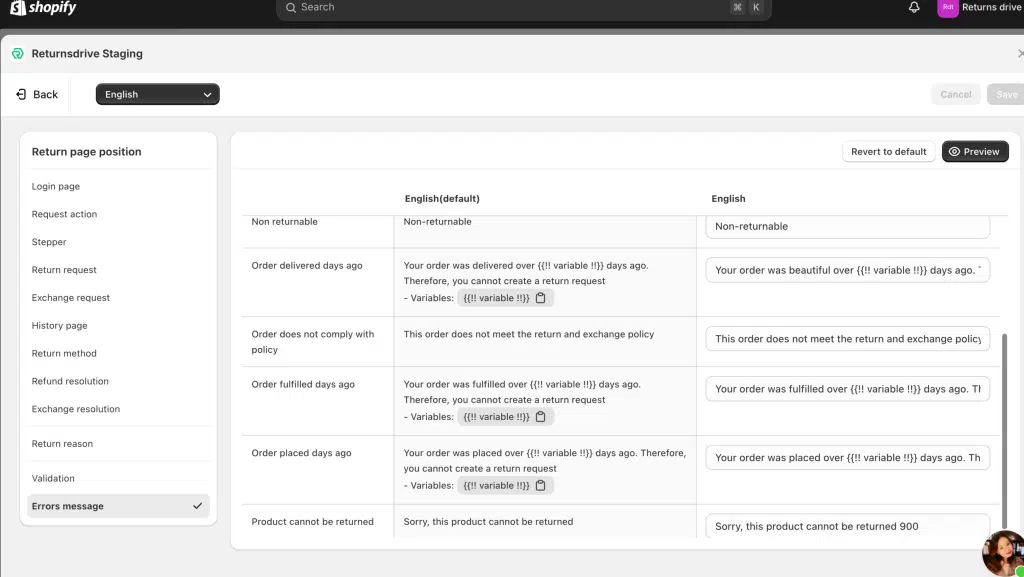
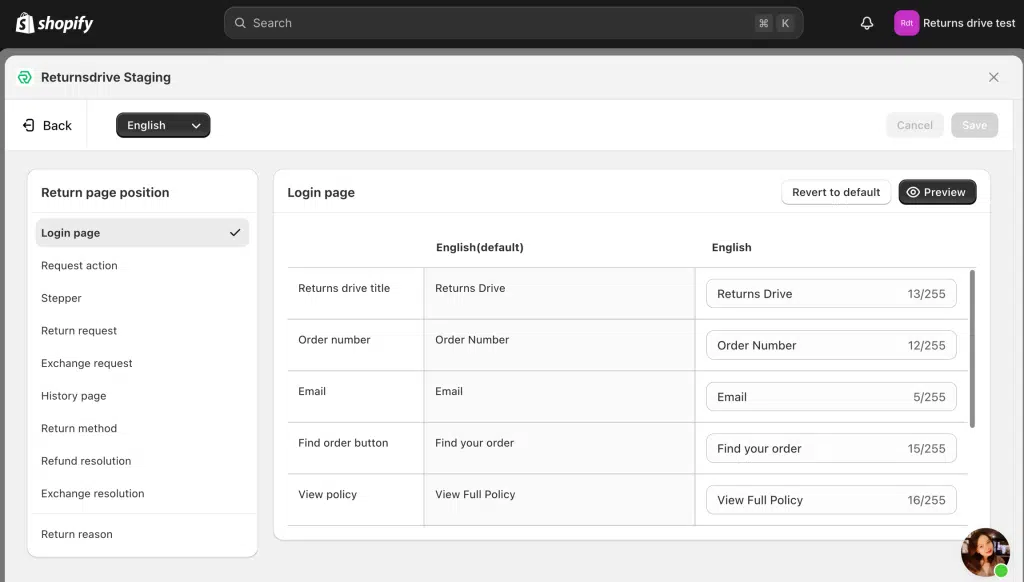
3. Click the “Save” button to apply the changes to the selected sections.

