Receiving and Approving the Exchange Request
- Locate the exchange request in the pending exchanges section.
- Review the details of the request.
- If appropriate, approve the exchange request.
Creating Exchange Orders
After approving the exchange request, click on the option to create exchange orders. Synctrack will present you with four options for personalizing your business return/exchange flow:
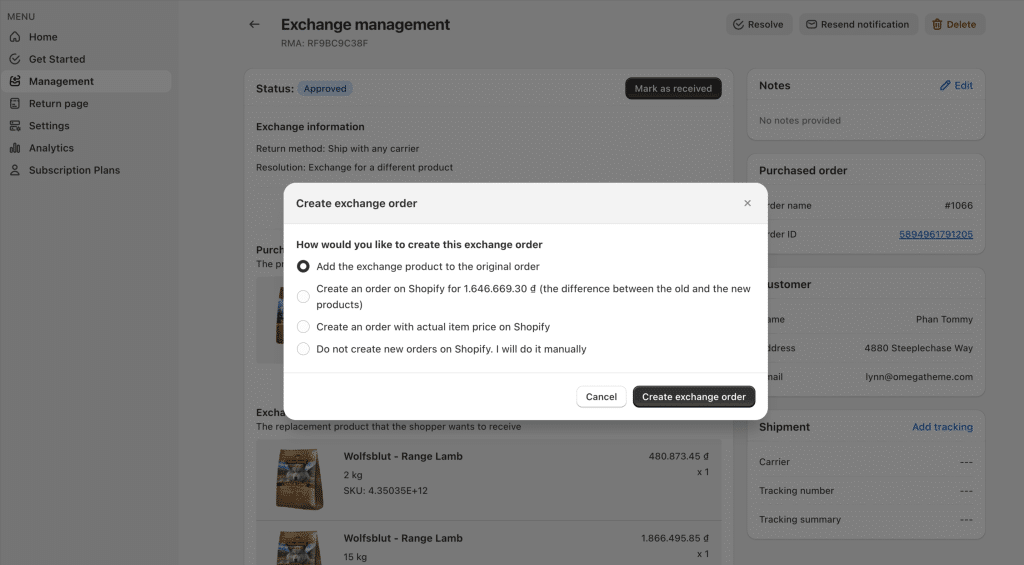
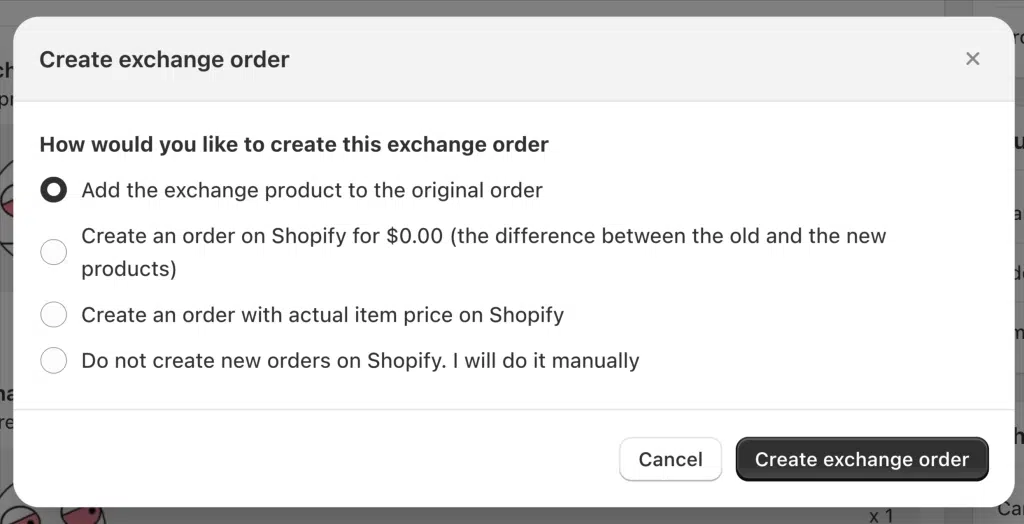
Option A: Add Exchange Product to Original Order
- Available only when feature Shopify Sync is enabled
- This option adds the new product to the existing order in Shopify
- Use this if you want to keep all related transactions under one order number.
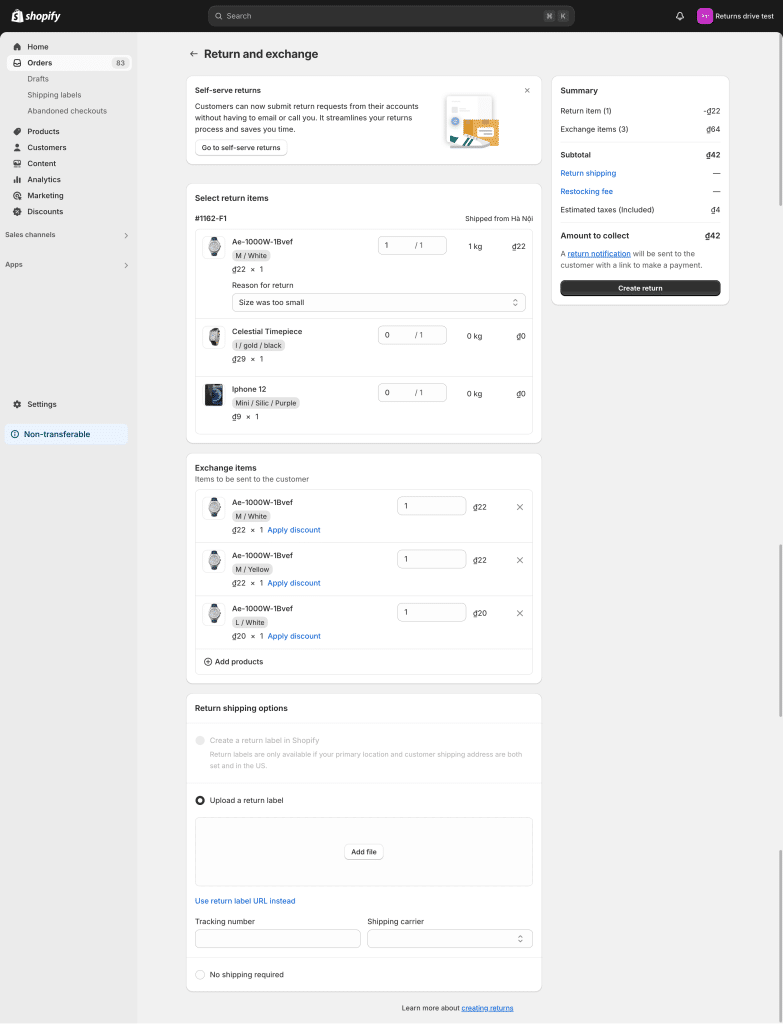
Option B: Create Order for Price Difference (Automatic)
- Synctrack will automatically create an order in Shopify admin for the price difference between the original and new product.
- Example: If the difference is $1, an order for this amount will be created.
- This option is useful for capturing only the additional cost or refund amount
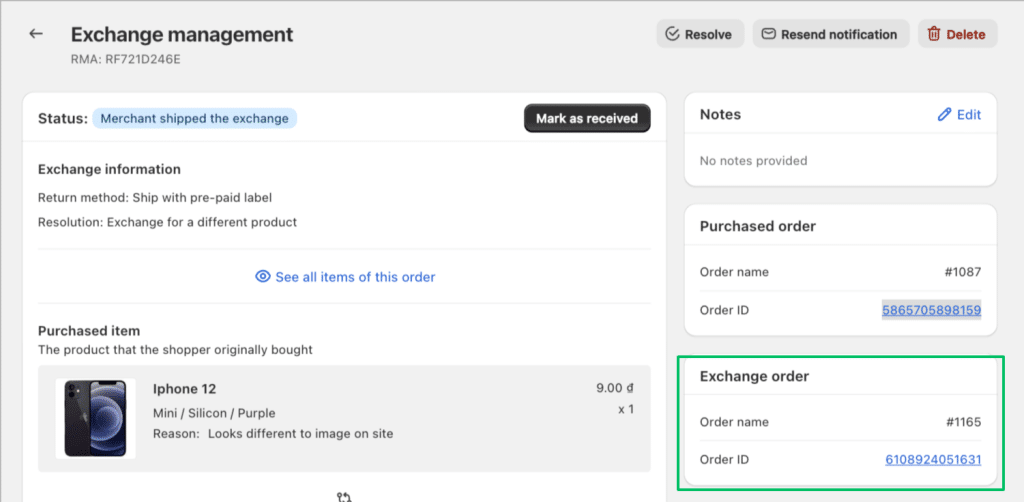
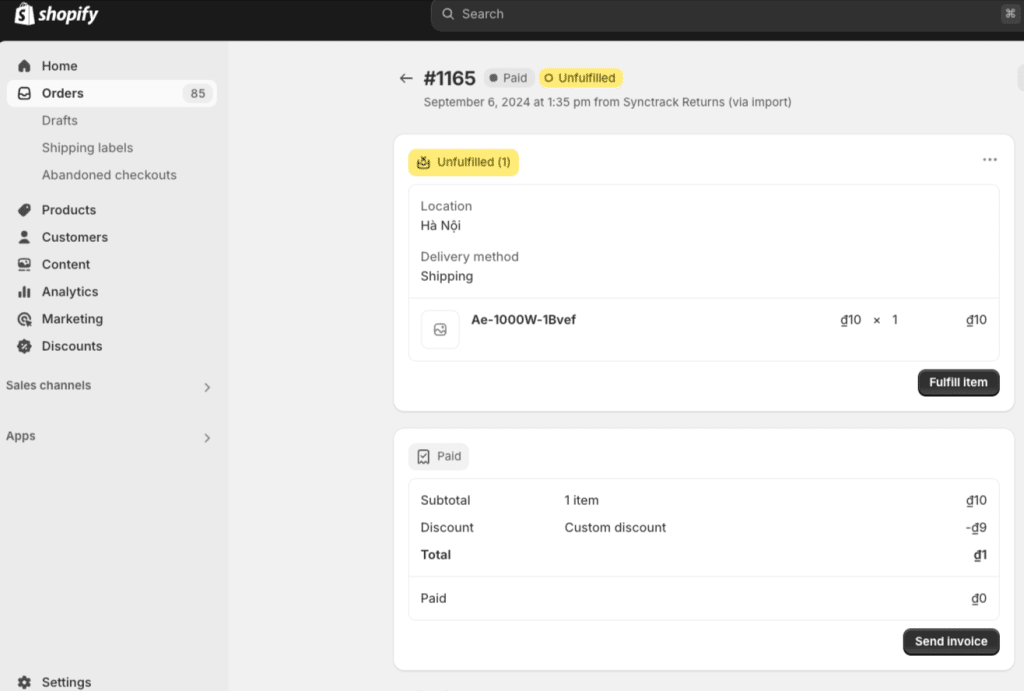
- In return request details, there is a card of Exchange order leading to the new order on Shopify admin with the difference pricing
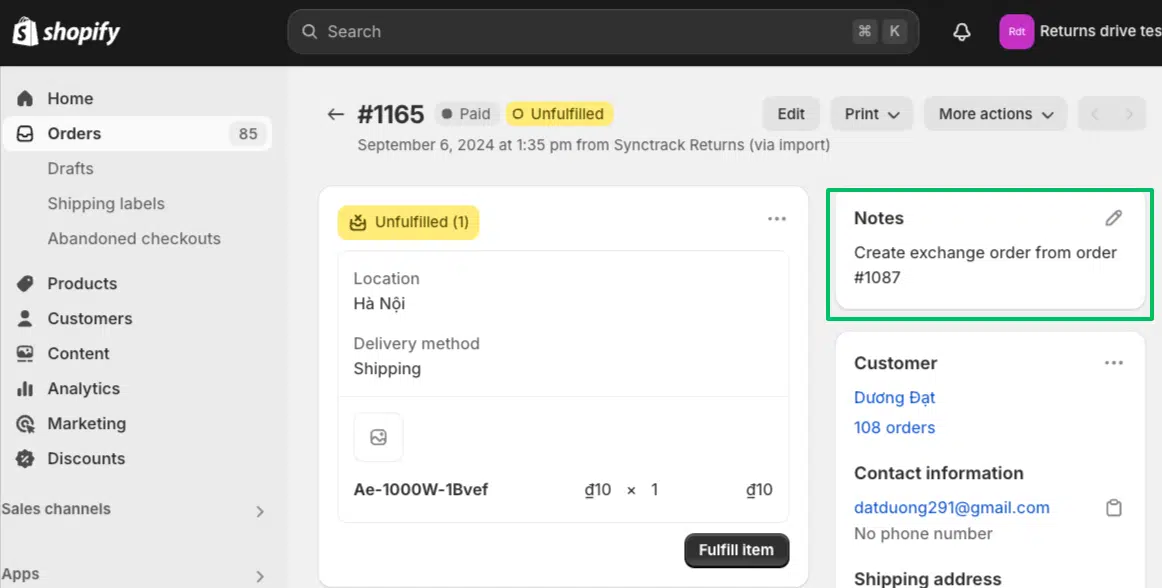
- You can see on Shopify order admin a note “Create exchange order from order #{{1087}}’ and tag “Exchange order from #{{1087}}” for the exchange order you has created from Synctrack
Option C: Create New Order with Full Item Price
- This option creates a new order in Shopify with the full price of the exchange item.
- Use this when you want a separate, full-value transaction for the new item.
In return request details, there is a card of Exchange order leading to the new order on Shopify admin with the difference pricing
The same as option B, You can see on Shopify order admin a note “Create exchange order from order #{{1087}}’ and tag “Exchange order from #{{1087}}” for the exchange order you has created from Synctrack
Option D: Do Not Create New Orders
- Select this if you prefer to create orders manually in Shopify
- This gives you full control over the order creation process.
Price differences in E-commerce exchanges: 2 Key scenarios
The exchanged item is more expensive
Scenario:
A customer bought an Iphone for $9 and wants to exchange it for a watch priced at $10.
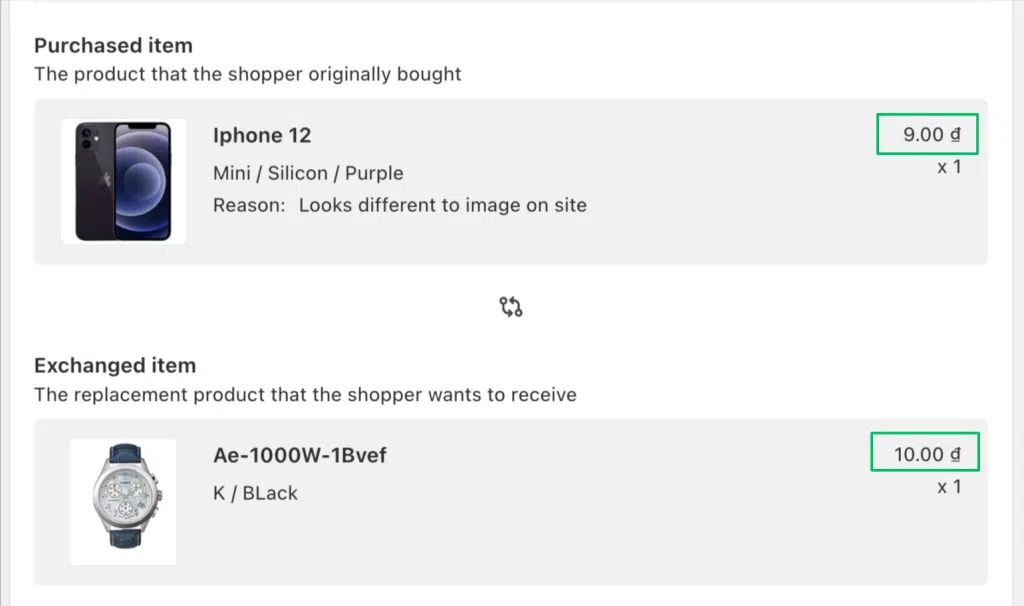
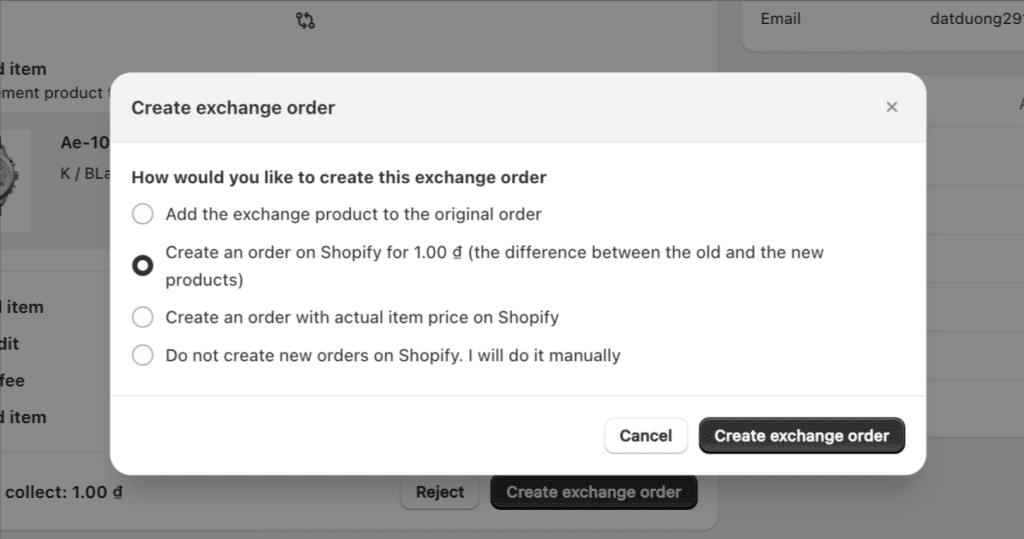
In this case, Synctrack would automatically calculate the price difference, as the example above, $1. You can see option create an order on Shopify for $1. To receive the fund from shopper when exchange item’s price > purchased item price, please choose this option. Then you can issue an invoice through new Shopify order and shopper pays at checkout as usually
Suggest to handle
- Calculate the price difference: In this case, it’s $1 ($10 – $9).
- Communicate clearly: Inform the customer about the price difference and the need for additional payment.
- Collect additional payment (If : Choose option Create an order on Shopify for to securely collect the $1 difference.
- Update order details: Modify the exchange order to reflect the new item and additional payment.
Best Practices:
- Ensure your exchange policy clearly states how price differences are handled.
- Make the process of paying the difference as smooth as possible to reduce friction.
- Train customer service staff to explain this scenario clearly and positively
The purchased item is more expensive
Scenario:
A customer bought an watch for $90 and wants to exchange it for another priced at $70.
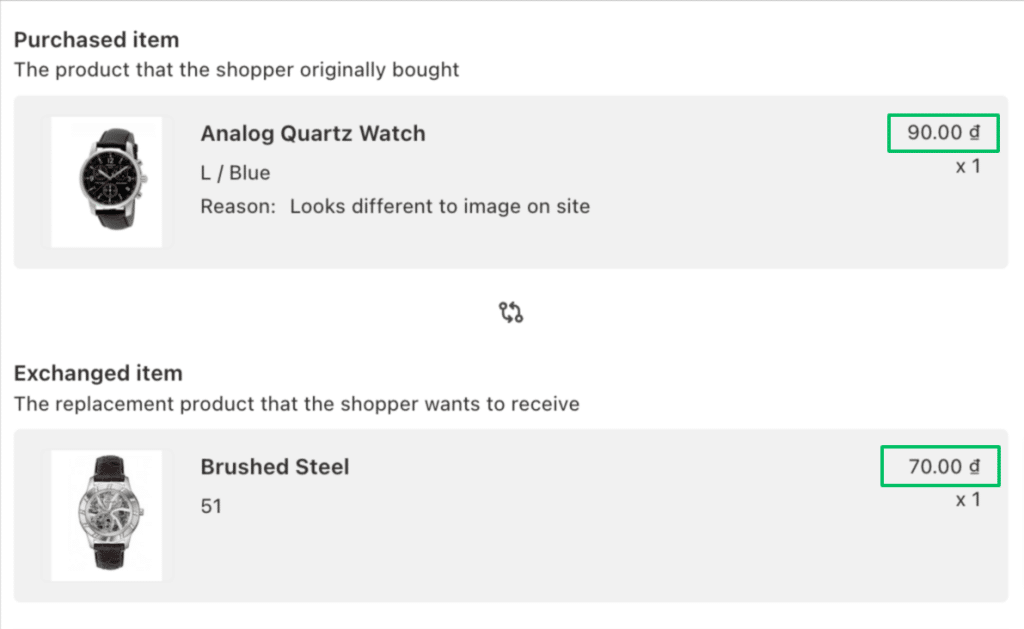
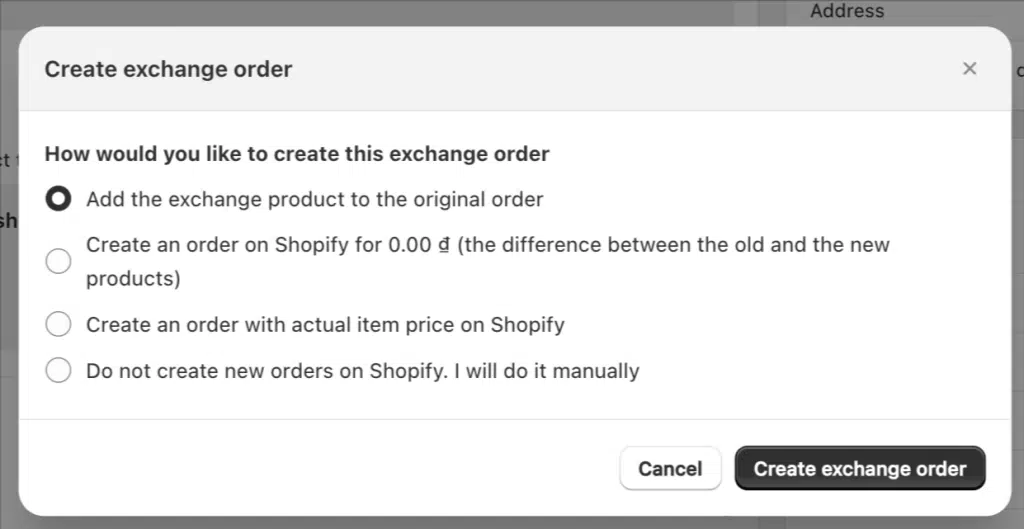
In this case, you can see the option Create an order on Shopify with price of $0, because merchant need to refund for shoppers $20 as example above
Suggest to handle
- Calculate the Difference: Here, it’s $20 ($100 – $80).
- Process the Refund
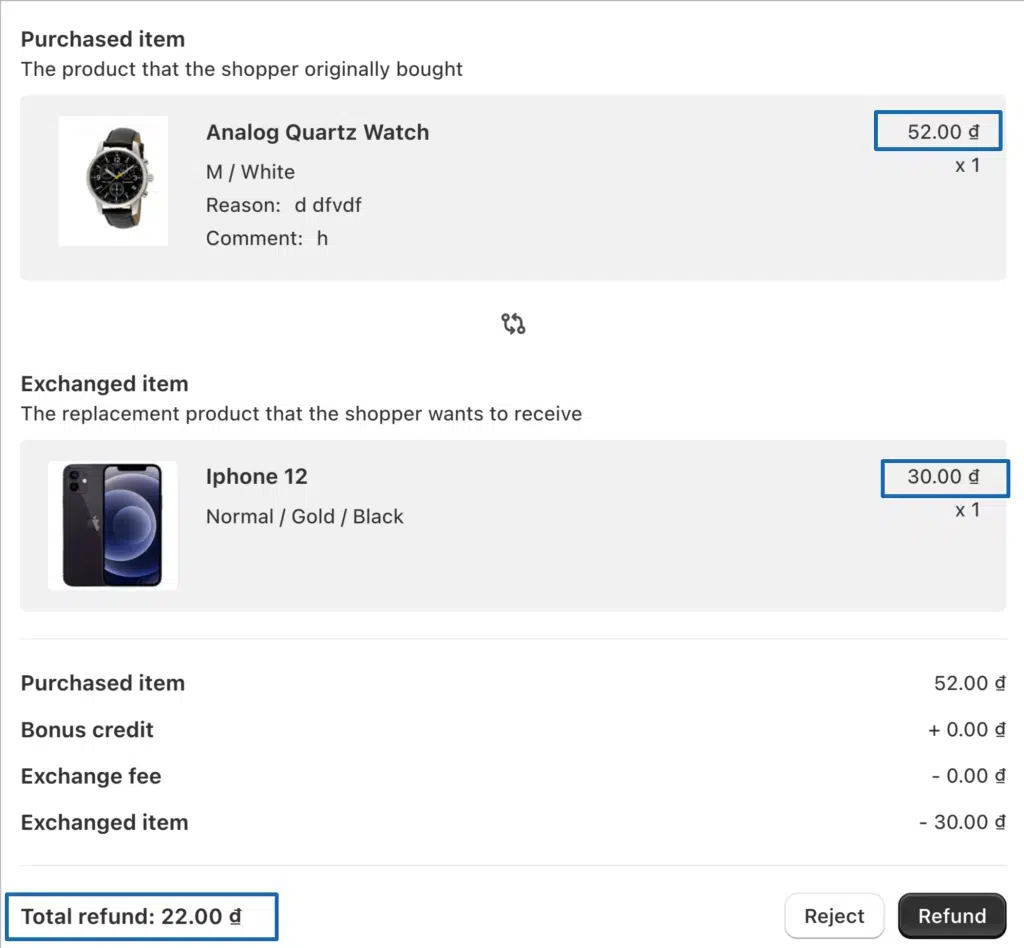
Selecting Your Preferred Option
- Review each option carefully.
- Consider your business needs, accounting practices, and inventory management.
- Click on your chosen option to proceed.

