This feature allows merchants to manually create and manage return and exchange requests directly from their dashboard, streamlining the process for both merchants and customers.
Accessing the Feature
- Log in to your merchant dashboard.
- Navigate to the Management tab
- Look for and click on “Create Return/Exchange Request.”
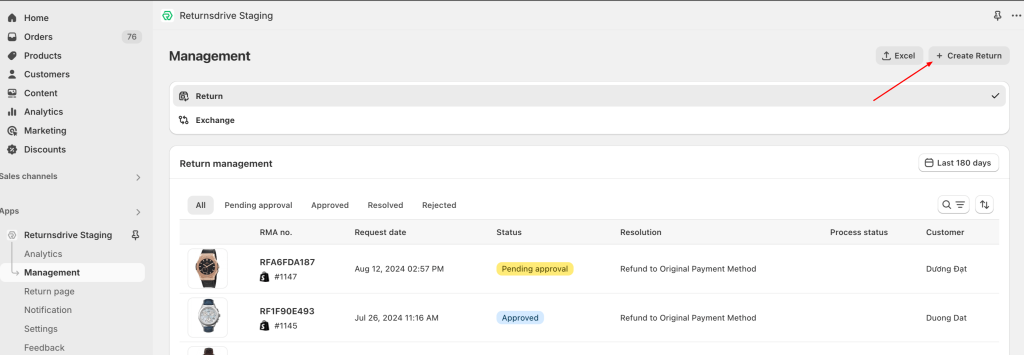
Creating a Return Request
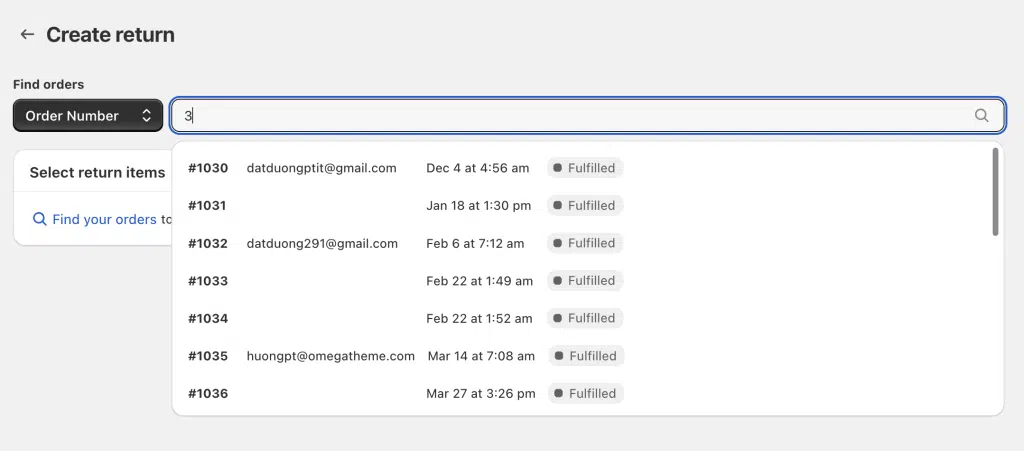
Step 1: Search for the Order
- In the search bar at the top of the page, enter either:
- Order number, or
- Customer’s email address
- Phone number

2. As you type, you may see suggestions appear. You can select one of these or complete your entry.
Step 2: Select Items for Return
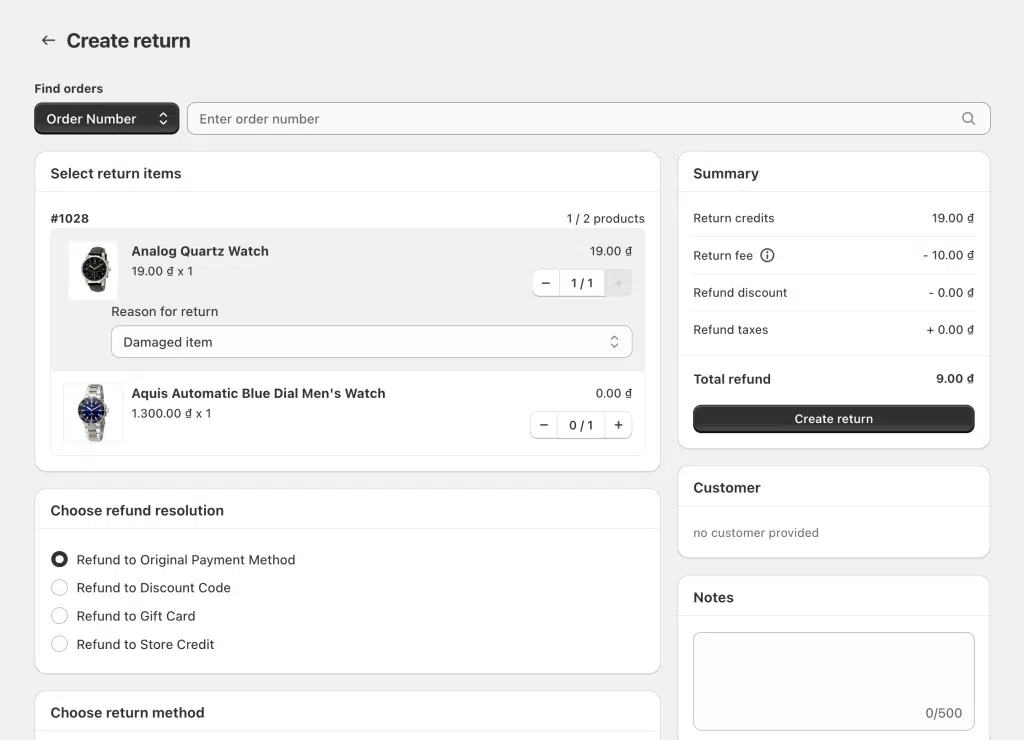
- You’ll see a list of products from the order. Each row shows:
- Product name
- Price
- Quantity
- Reason (if applicable)
- For each item to be returned:
- Enter the quantity in the “Quantity” field.
- The row will be highlighted when a quantity greater than 0 is entered.
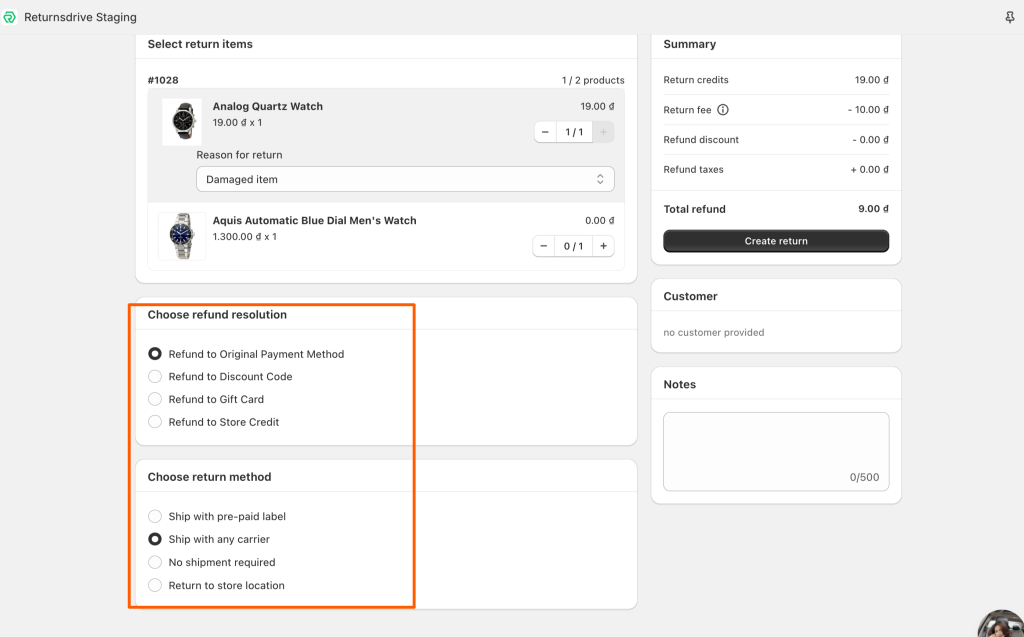
Step 3: Choose Return Method and Resolution
- Under “Refund Method,” select one of the following:
- Refund to Original Payment Method
- Store Credit
- Gift Card
- Exchange
Note: Some options may be unavailable depending on your plan. ]
- Under “Resolution,” choose how the return will be processed:
- Ship with any carrier
- Print a label
- Refund without return
- Exchange
Note: As with refund methods, some options may require a plan upgrade.
Step 4: Add Notes (Optional)
If needed, add any additional information or instructions in the “Note” field.
Step 5: Submit the Return Request
- Review all entered information for accuracy.
- Click “Create Return” at the bottom of the summary section.
- The request will be created and set to “pending approval” status.
Creating an Exchange Request
Steps 1-2: Search and Select Items
Follow the same process as for returns to search for the order and select items.
Step 3: Add Exchange Items
- Click “Add Product ” for each item to be exchanged.
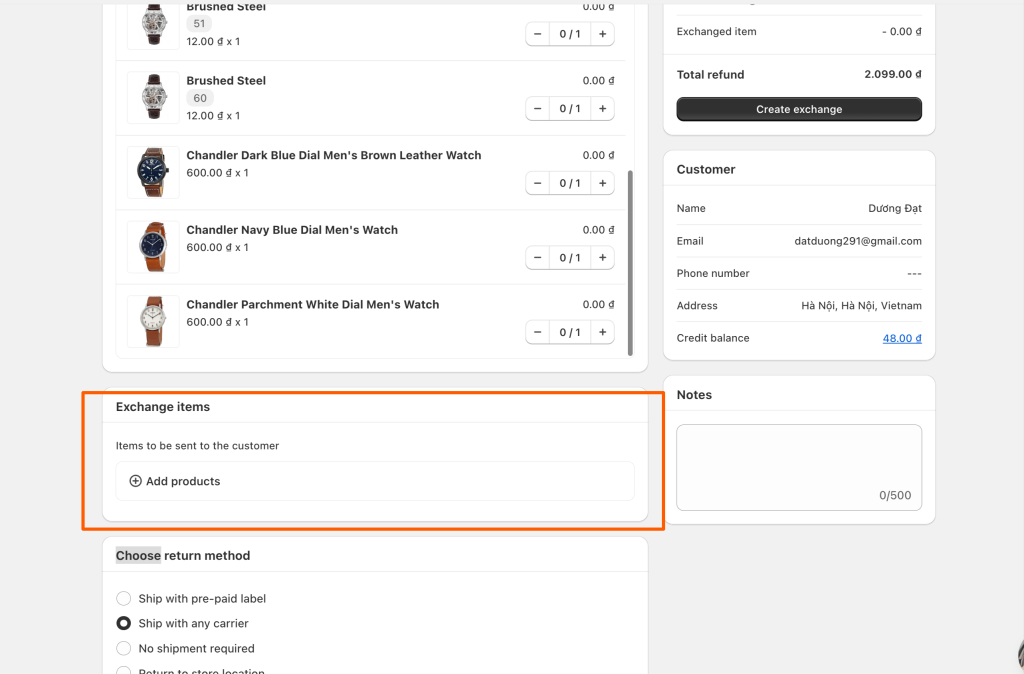
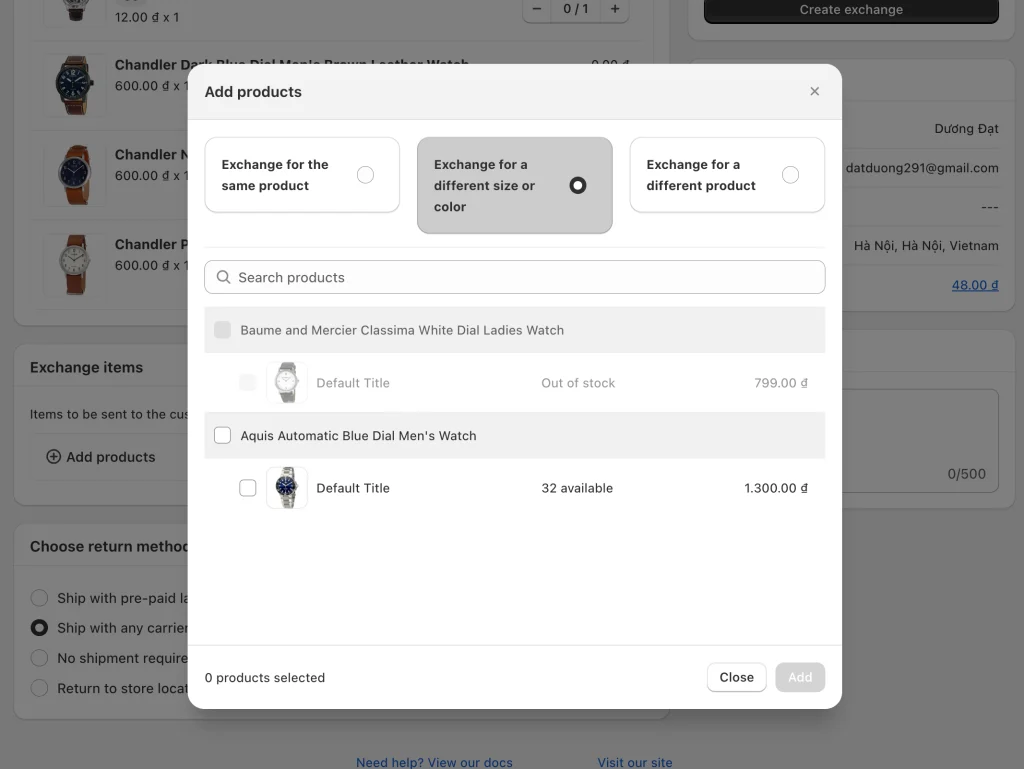
2. You’ll see three options:
- Exchange for the same product
- Exchange for another variant
- Exchange for a different product
3. Select the appropriate option and follow the prompts to choose the exchange item.
Step 4: Complete the Exchange Request
- Review all information for accuracy.
- Click “Create Exchange” at the bottom of the summary section

