
This guide will walk you through the process of creating and printing return labels for customer returns. Following these steps will ensure smooth processing of return requests.
Access Return Requests
- Log in to your merchant dashboard.
- Navigate to the “Management” tab.
- Locate the return request for which you need to create a label.
Create a Return Label
- Open the specific return request.
- Click to button Approve
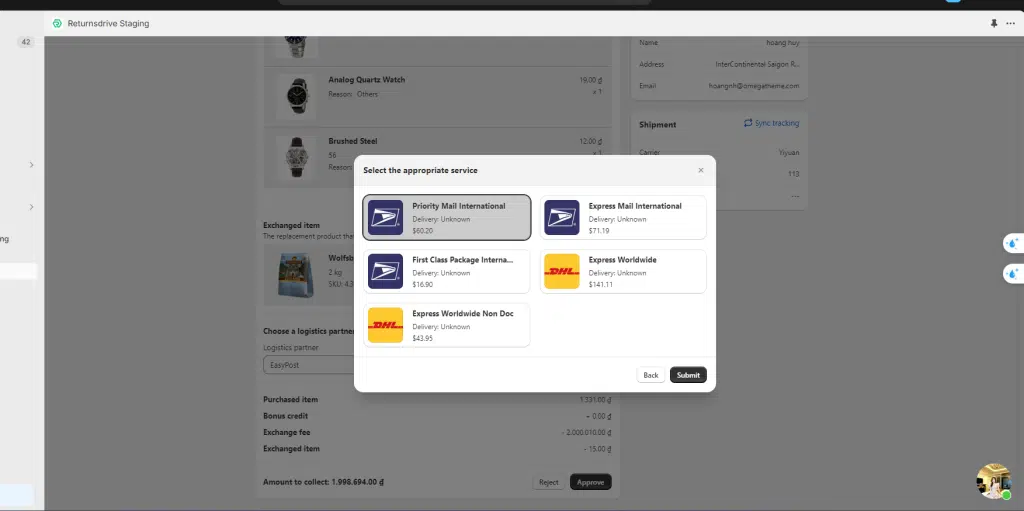
- Select the appropriate shipping carrier if prompted.
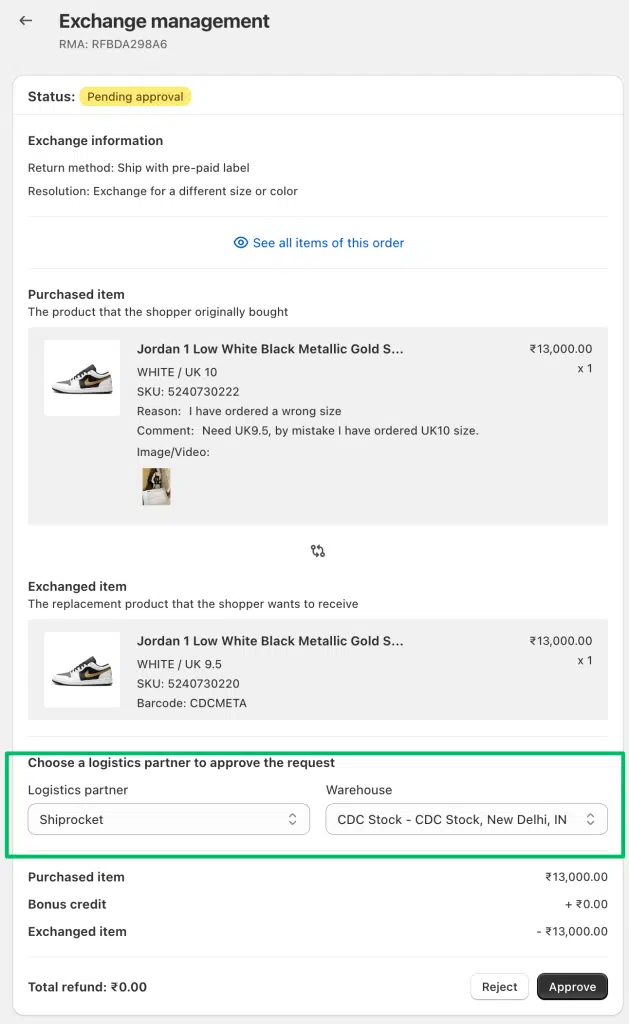
- Choose 1 of 3 options for return label (Automated, Manual, Select return shipping method later)
- For option Automated, enter the package dimensions and weight if required.

- Choose the shipping service level (e.g., Ground, Express)
- Review all information for accuracy.
- Confirm to generate the label.
Troubleshooting:
- If a label fails to generate, verify that all required fields are filled correctly.
- Ensure your account with the shipping carrier is active and in good standing.
- Check that your warehouse address in the system exactly matches the address in your carrier account.
- If issues persist, contact our support team for assistance.
Best Practices:
- Regularly update your return policy and shipping options to reflect current carrier services.
- Consider offering multiple carrier options to customers for flexibility.
- Implement a quality check process to ensure labels are printed clearly and accurately.
For more detailed information on specific carriers or advanced label customization options, please refer to our additional shipping documentation.