Step 1: Create API user
First, you need to register with ShipRocket and create an account. Click on this link to complete the sign-up process.
After the sign-up process is complete, follow the enlisted steps to create an API user:
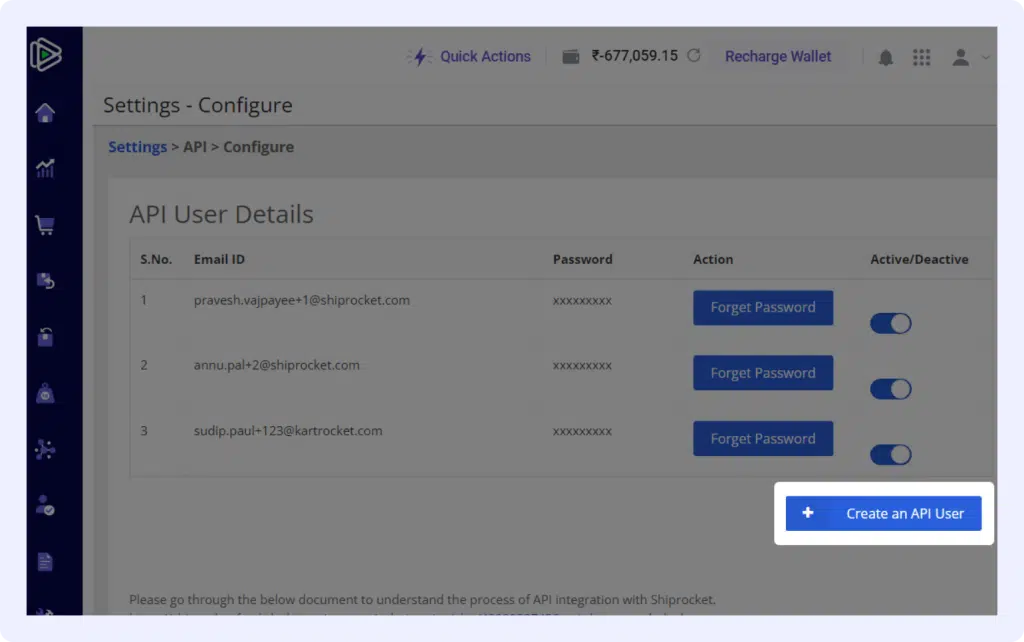
- Open your Shiprocket account and navigate to the left-hand panel.
- Click On Settings => API => Configure => Create an API user.
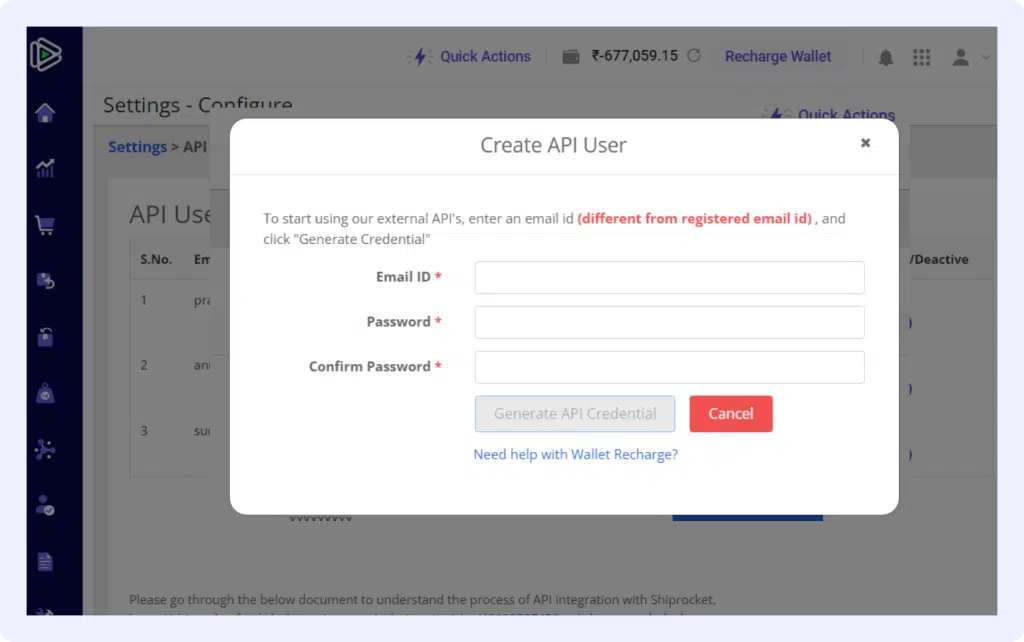
- On the pop-up menu, fill in the email (this should be different from the one used to register to ShipRocket).
- Fill in an appropriate password and confirm the password.
Step 2: Connect to Shiprocket in the Synctrack Returns app?
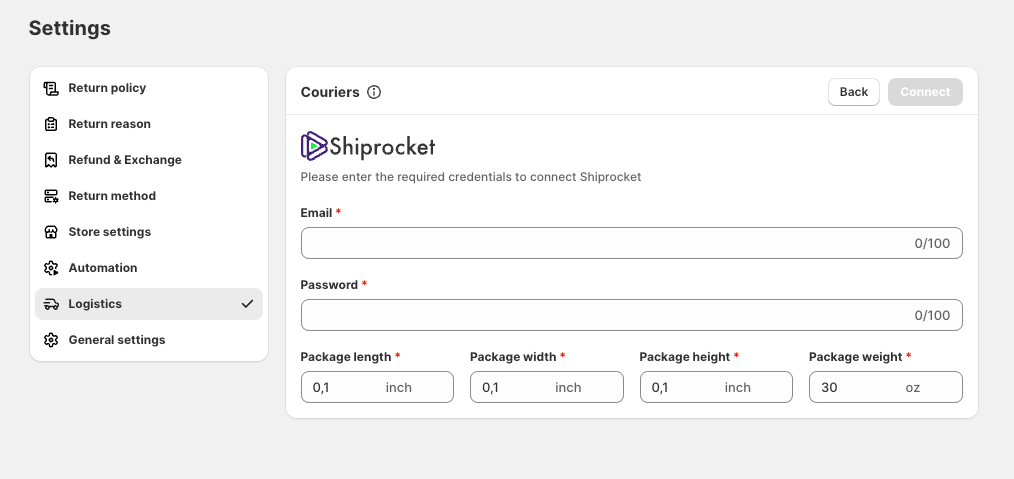
- Go to Settings -> Logistics -> Shiprocket. Click on the Connect button.
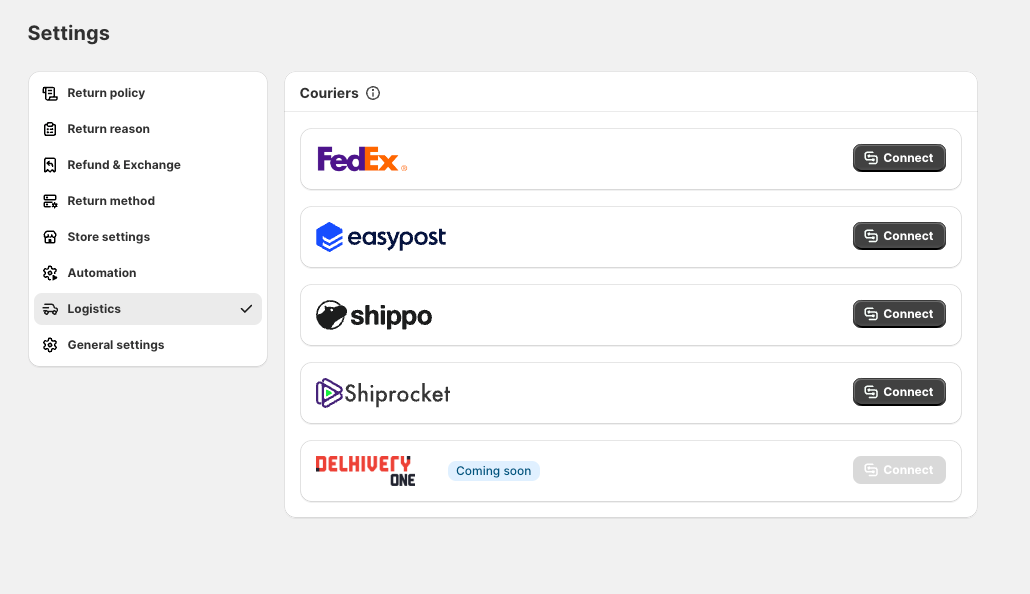
- Enter the email and password just created above and click Connect
Step 3: Configure Settings
After connecting:
- Set your default package sizes and types.
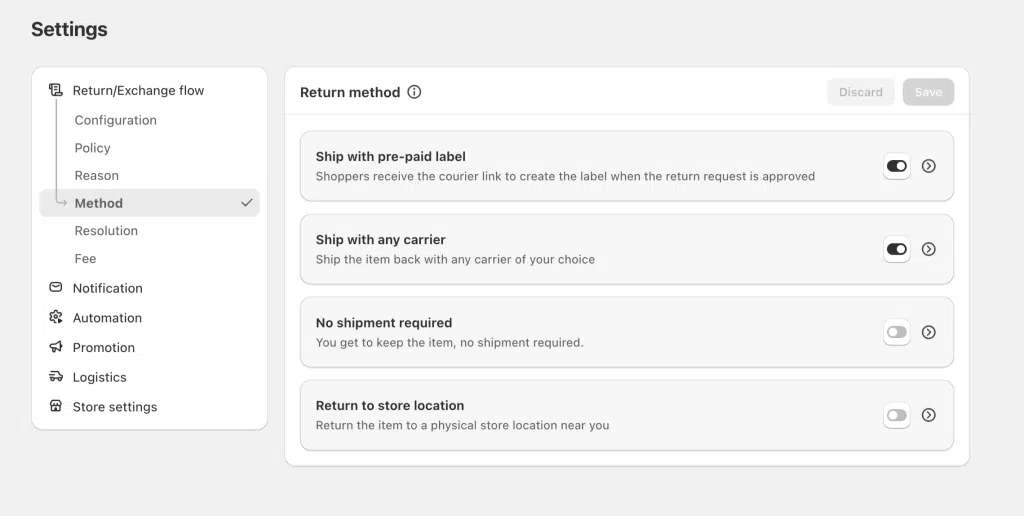
- Make sure method “Ship with pre-paid lable” is enabled
Step 4: Test the Connection
Before going live:
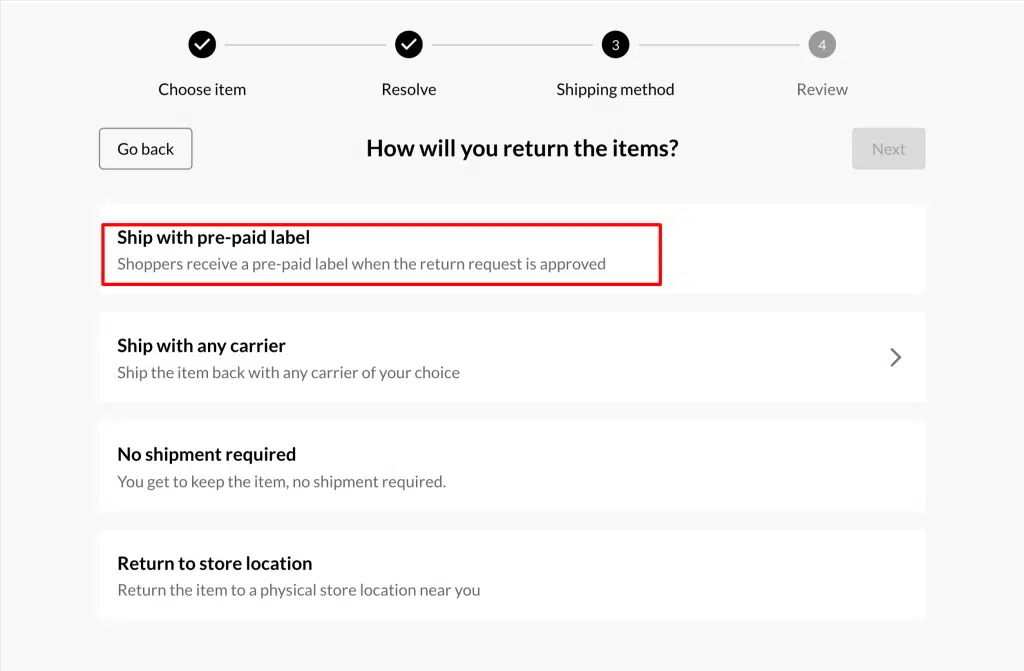
- Create a test return request on return page
- Choose “Ship pre-paid label” for return method (This method is only displayed on return page if you enable it in the app as the step above mentioned)
- Submit request
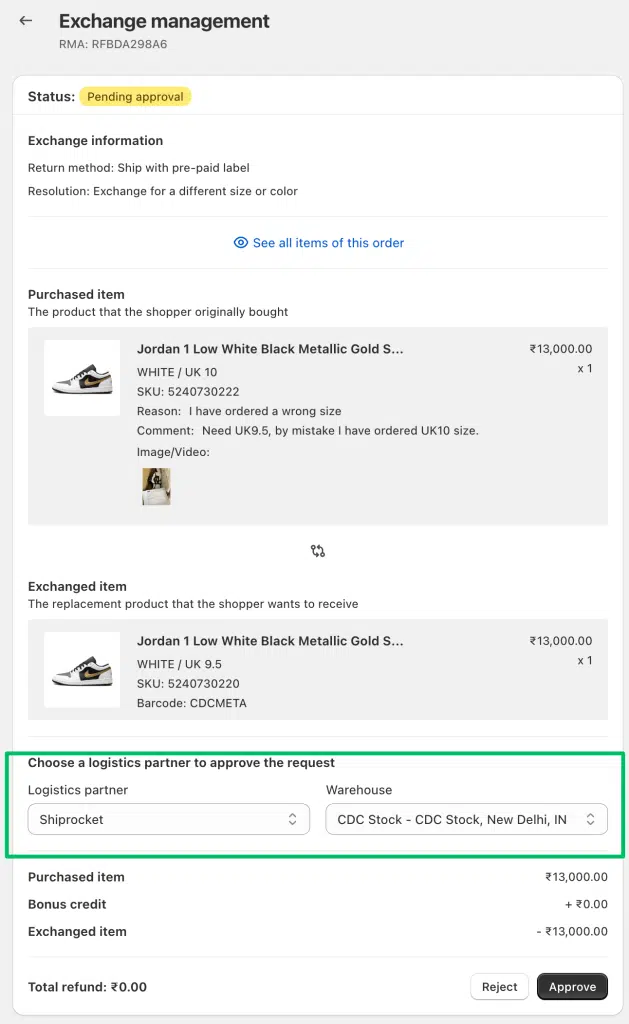
- Go into the app, open this request at tab “Return management”
- Click to approve the request & Select the appropriate shipping carrier if prompted.
- Verify that the label is created correctly and contains accurate information.
- For more info of How to create and print return labels, click here

