Step 1: Access Your Shopify Admin Dashboard
- Log in to your Shopify account.
- Navigate to the Admin Dashboard.
Step 2: Create a New Page
- In the Shopify Admin Dashboard, go to Online Store in the left-hand menu.
- Click on Pages.
- Click on Add Page.

Step 3: Configure the New Page
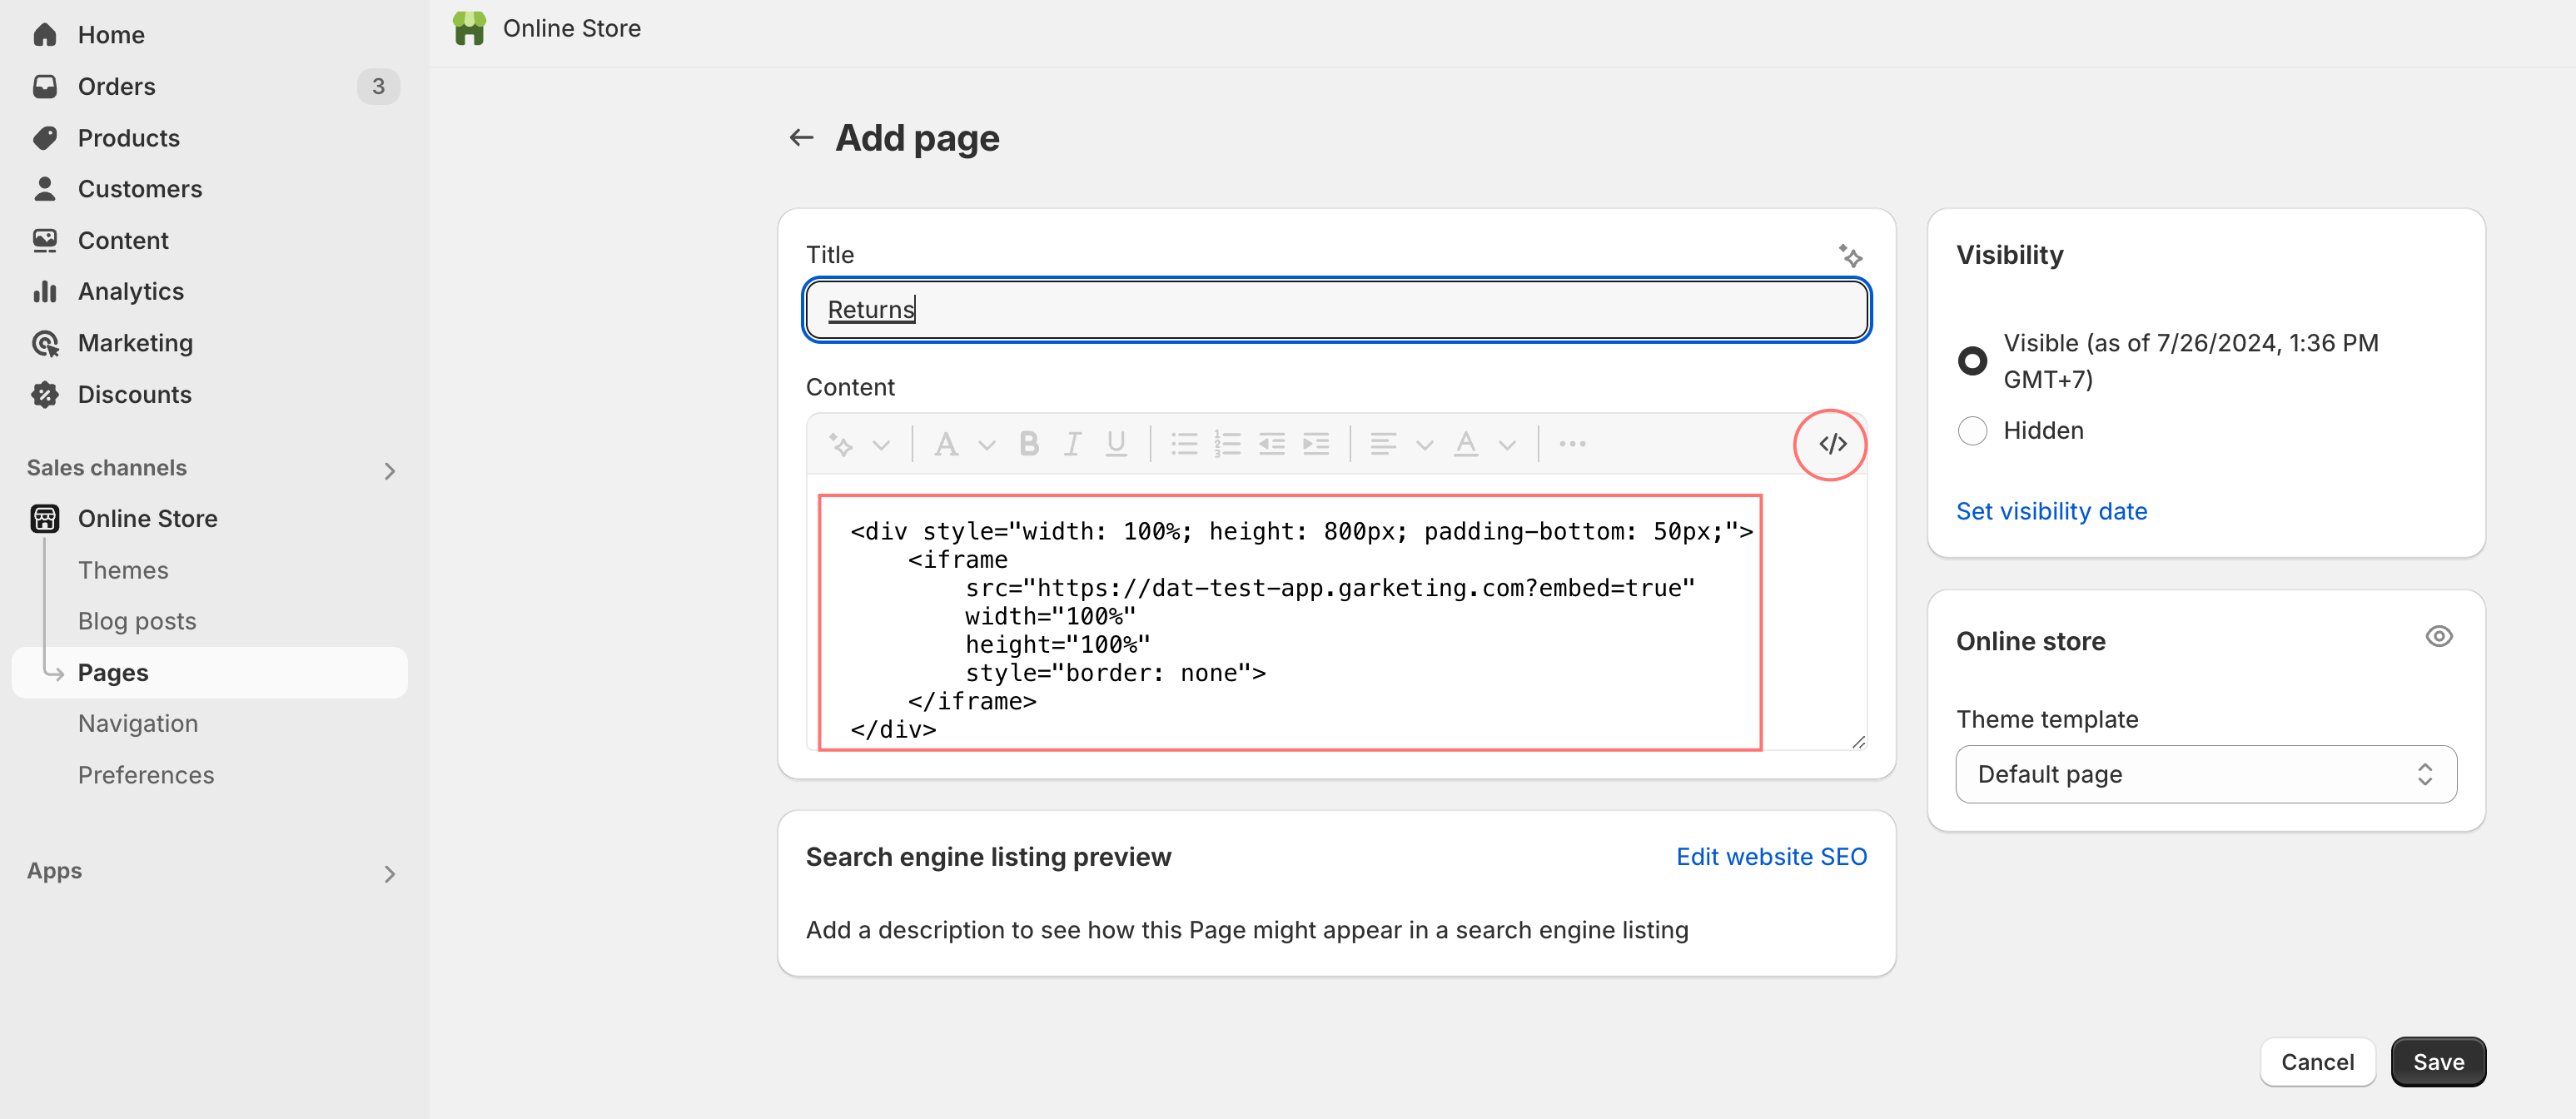
- In the Title field, enter a suitable title for your return page, such as “Returns” or “Return & Exchange”.
- In the Content section, switch to the HTML editor by clicking on the <> icon.

Step 4: Embed the Return Page Code
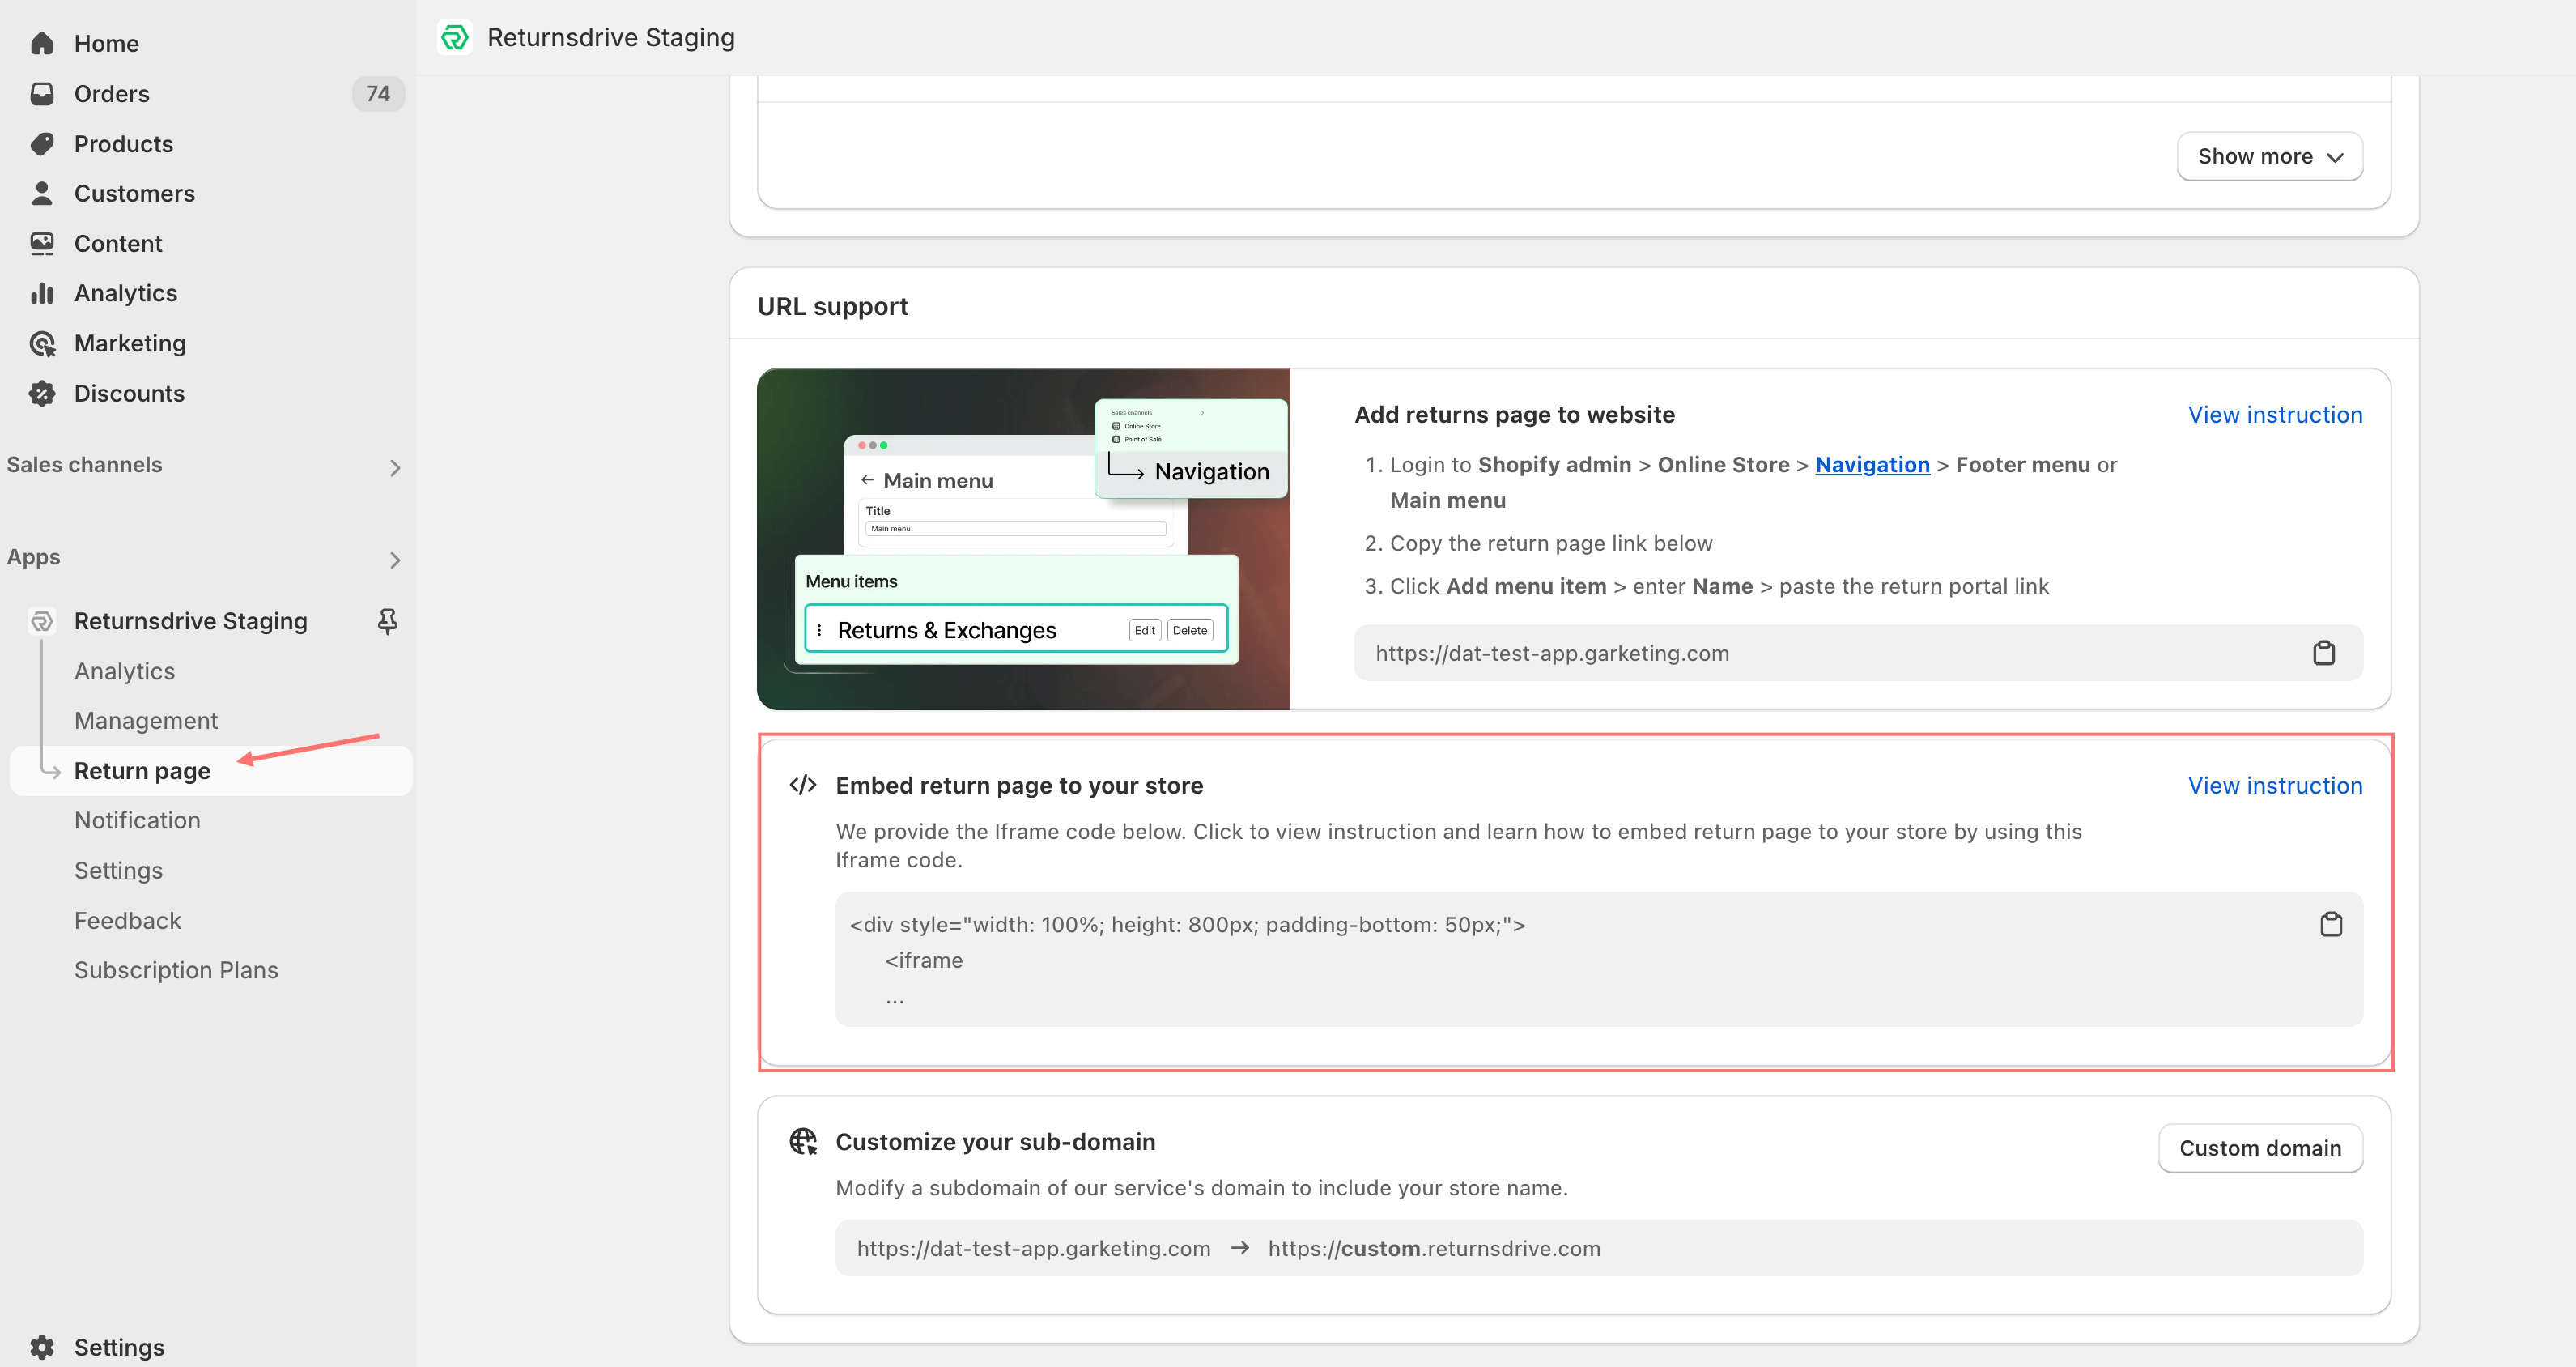
- Obtain the embed code for your Synctrack Returns page from your Synctrack Returns dashboard.
- Log in to your Synctrack Returns account.
- Navigate to the Return Page settings.
- Copy the provided embed code.
- Paste the copied embed code into the HTML editor of the new page on Shopify.


Step 5: Save and Publish the Page
- Click Save to create the new page.
- You can view the new page by clicking on the View Page button after saving.
What’s differnece between embedding and adding link of return page?
| Aspect |
Embedding |
Adding a Link |
| Display |
Content appears directly on your store’s page |
Users are redirected to an external page |
| User Experience |
Seamless integration within your store |
Users leave your store to access the external content |
| Implementation |
Requires embedding HTML code into your Shopify page |
Requires adding a hyperlink URL in the navigation menu |
| Example |
An embedded returns form on your Shopify page |
A navigation link to a return portal hosted on another domain |


