Picture this: a shopper finds a product they love on your Shopify store. They’re ready to buy – but they can’t tell when it’ll arrive. So they leave and buy from a competitor who shows a clear delivery date. That’s a sale you didn’t have to lose.
A Shopify estimated delivery date (EDD) solves this problem. When shoppers can see a realistic delivery window right on the product page or at checkout, they feel more confident. They’re more likely to complete the purchase – and less likely to email your support team asking, ‘Where’s my order?’
This guide covers everything you need to know: what EDD means, how Shopify handles it natively, how to add it with a bit of code, and which Shopify EDD apps are worth your time.
What Is a Shopify Estimated Delivery Date?
An estimated delivery date (EDD) is the date range you show shoppers for when their order is expected to arrive. It’s different from a shipping date – and that distinction matters.
Here’s how the pieces fit together:
- Fulfillment time: The time from when an order is placed to when you hand it to the carrier.
- Transit time: The time the carrier takes to deliver the package.
- EDD: Processing time + transit time = the delivery window your customer actually cares about.
You may also see ‘ETA’ (Estimated Time of Arrival) used interchangeably with EDD in app listings and Shopify documentation. They mean the same thing in this context.
The goal is simple: give shoppers a realistic, honest delivery window before they buy. It builds trust, reduces support tickets, and increases conversions.
Does Shopify Show Estimated Delivery Dates Natively?
Yes – but with conditions. Shopify has built-in delivery date features, and they work well within certain limits. Here’s a breakdown of what’s available out of the box.
Fulfillment Time
You can set a processing time in your Shopify admin under Settings > Shipping and delivery. This tells Shopify how long it typically takes you to fulfill an order before handing it off to a carrier.
Shopify recommends keeping processing time to two business days or fewer. This helps ensure your store qualifies to show faster delivery dates at checkout.
Manual Delivery Dates
Manual delivery dates combine your processing time with a carrier’s transit time. When set up correctly, Shopify shows a delivery date range at checkout – not just a shipping window.
There are a few important limits to know:
- Manual delivery dates don’t work with shipping rates from third-party apps.
- Shopify uses a 12 pm cutoff time (in your shipping origin timezone) to decide whether an order placed today counts as ‘today’s’ processing or tomorrow’s.
- Weekends and holidays affect how processing time is counted.
- Availability depends on your carrier, shipping rates, and origin country.
Automated Delivery Dates
Automated delivery dates are available for stores in the United States and select European countries. Shopify calculates these automatically based on historical fulfillment and shipping data.
To qualify, your store needs:
- A Basic plan or higher
- In-stock items
- A prediction window within 5 days for US orders (4 days for Europe)
If Shopify can’t generate an automated estimate, it falls back to showing transit time or fulfillment time instead.
Shop Promise
Shop Promise is a Shopify program that displays delivery dates and trust badges on product pages, at checkout, and inside the Shop app. It’s based on your store’s historical fulfillment and shipping performance – not a carrier guarantee.
Shop Promise is only available for domestic US orders expected to arrive within five calendar days. Your store also needs to meet performance requirements and have Shop Pay activated.
The bottom line: Shopify’s native features are useful for showing delivery dates at checkout. But many merchants still need a theme-level solution or a Shopify EDD app to display estimates on product pages, in the cart drawer, or on the order confirmation page.
How to Add Manual Delivery Dates on Shopify
There are three main ways to add EDD to your Shopify store. The right approach depends on your technical comfort level, your store plan, and where you want delivery dates to appear.
Option 1: Set up automated delivery dates with Shopify (Easiest)
If you just want delivery dates to show at checkout, start here. In your Shopify admin:
- Go to Settings > Shipping and delivery.
- Set your processing time.
- Make sure your shipping rates are either flat rates with transit times configured or carrier-calculated rates – not rates provided by a third-party shipping app.
- Shopify will handle the rest at checkout.
This works well for stores that are eligible for manual or automated delivery dates. But it won’t show EDD on your product pages or in the cart.
Option 2: Add Shopify EDD to Your Product Page with Code
This approach uses Shopify metafields and JavaScript to calculate and show a delivery date range on your product page. It’s a solid DIY option if you’re comfortable editing theme code.
Step 1: Create two product metafields:
- custom.handling_days_min (number: minimum handling days)
- custom.handling_days_max (number: maximum handling days)
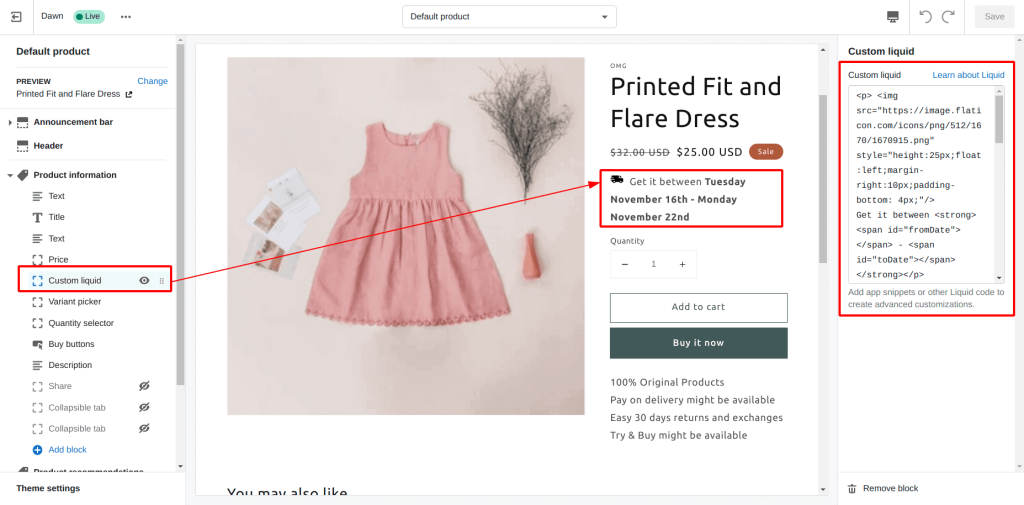
Step 2: Add this Liquid + JavaScript snippet to your product template:
{%- comment -%}
Product page EDD — requires product metafields:
custom.handling_days_min and custom.handling_days_max
{%- endcomment -%}
{% assign min_days = product.metafields.custom.handling_days_min.value | default: 3 %}
{% assign max_days = product.metafields.custom.handling_days_max.value | default: 7 %}
<div class=”edd-widget” data-min-days=”{{ min_days }}” data-max-days=”{{ max_days }}”>
<strong>Estimated delivery:</strong>
<span class=”edd-range” aria-live=”polite”></span>
<div class=”edd-disclaimer”>Dates are estimates and may change due to carrier delays.</div>
</div>
<script>
(function () {
const el = document.currentScript.previousElementSibling;
if (!el || !el.classList.contains(‘edd-widget’)) return;
const minDays = parseInt(el.dataset.minDays, 10);
const maxDays = parseInt(el.dataset.maxDays, 10);
const addDays = (date, days) => { const d = new Date(date); d.setDate(d.getDate() + days); return d; };
const now = new Date();
const from = addDays(now, minDays);
const until = addDays(now, maxDays);
const fmt = new Intl.DateTimeFormat(undefined, { month: ‘short’, day: ‘numeric’ });
el.querySelector(‘.edd-range’).textContent = `${fmt.format(from)} – ${fmt.format(until)}`;
})();
</script>
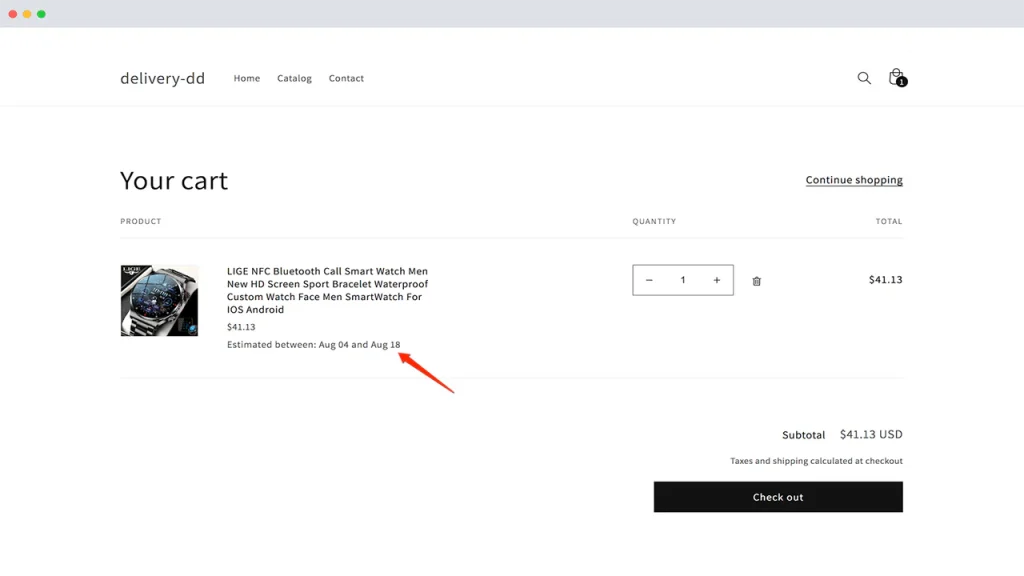
This snippet reads the handling days from your product metafields and calculates a delivery range in the shopper’s local timezone.
Important limitations: This example doesn’t account for business-day logic, cutoff times, holidays, or destination-based transit times. For that level of accuracy, you’ll want to use an app.
Option 3: Cart Page and Cart Drawer EDD
Shoppers also want to see a delivery estimate in the cart before they commit. You can add a cart-level estimate using Liquid to loop through cart items and find the item with the longest handling time.
{% assign max_days = 0 %}
{% for item in cart.items %}
{% assign item_days = item.product.metafields.custom.handling_days_max.value | default: 0 %}
{% if item_days > max_days %}{% assign max_days = item_days %}{% endif %}
{% endfor %}
{% if max_days > 0 %}
{% assign seconds = max_days | times: 86400 %}
{% assign est = ‘now’ | date: ‘%s’ | plus: seconds | date: ‘%b %d’ %}
<p class=”cart-edd”><strong>Estimated delivery by:</strong> {{ est }}</p>
{% endif %}
One important note: Liquid’s now value can be cached, which means it may not always reflect the real current time. For live, accurate date calculations, it’s better to use JavaScript on the client side.
How To Add Automated Shopify Estimated Delivery Dates?
Automated delivery dates let your store show customers a specific delivery date at checkout – like “Estimated delivery Mon, Jun 30” – instead of a vague transit time range. This gives shoppers more confidence and helps reduce cart abandonment.
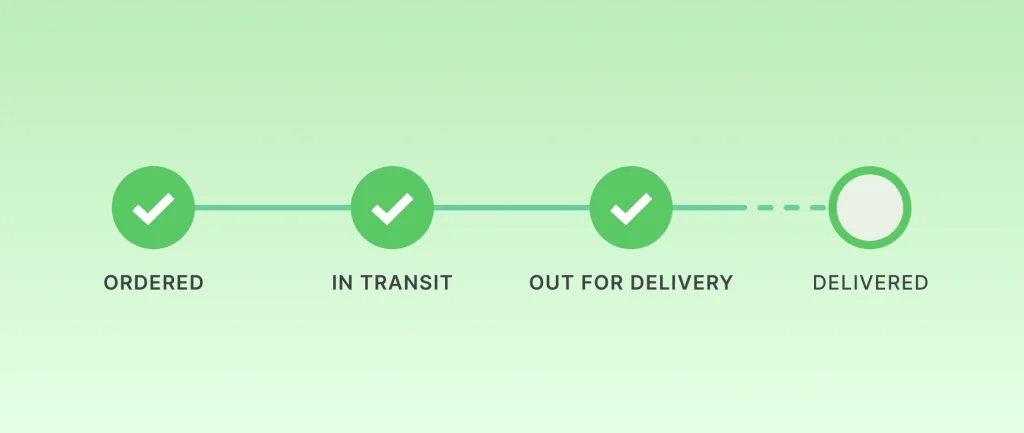
Once active, delivery dates appear in these places:
- Checkout (including Shop Pay)
- Order confirmation emails
- The Thank You and Order Details pages
- The Shop app (product pages and delivery tracking)
How Shopify Calculates the Date
Shopify looks at your past fulfillment history and typical carrier transit times to predict when an order will arrive. It’s not a carrier guarantee – it’s an estimate based on your store’s real data.
A few things to know:
- Estimates may run a bit longer than the actual delivery for orders going a long distance or placed outside of business hours.
- During busy or unpredictable periods (like holiday shipping seasons), automated dates may show less often.
Does Your Store Qualify?

Your store needs to:
- Be on the Basic plan or higher
- Have fulfilled at least one domestic order
- Have an active fulfillment location in an eligible country (US or select European countries)
- Never have violated Shopify’s Acceptable Use Policy
Each order also needs to:
- Ship to a customer in an eligible country
- Have a delivery prediction within 5 days (US) or 4 days (Europe)
- Include only in-stock, physical items – no digital products, pre-orders, subscriptions, or try-before-you-buy items
- Ship within the same region (US to US, or Europe to Europe – not US to Europe)
A few important things to keep in mind:
- If Shopify can’t generate an automated date for an order, it falls back to showing your transit time. If you haven’t set a transit time, it shows your fulfillment time instead.
- Before turning this on, remove transit time info from your shipping rate names and move it to the rate description instead. This prevents confusing duplicate info.
- If a US order’s delivery prediction is longer than 5 days, Shopify switches to manual delivery dates. The same rule applies for European orders beyond 4 days.
- Pre-orders managed through a pre-order app won’t show delivery dates. Manually managed pre-orders are fine.
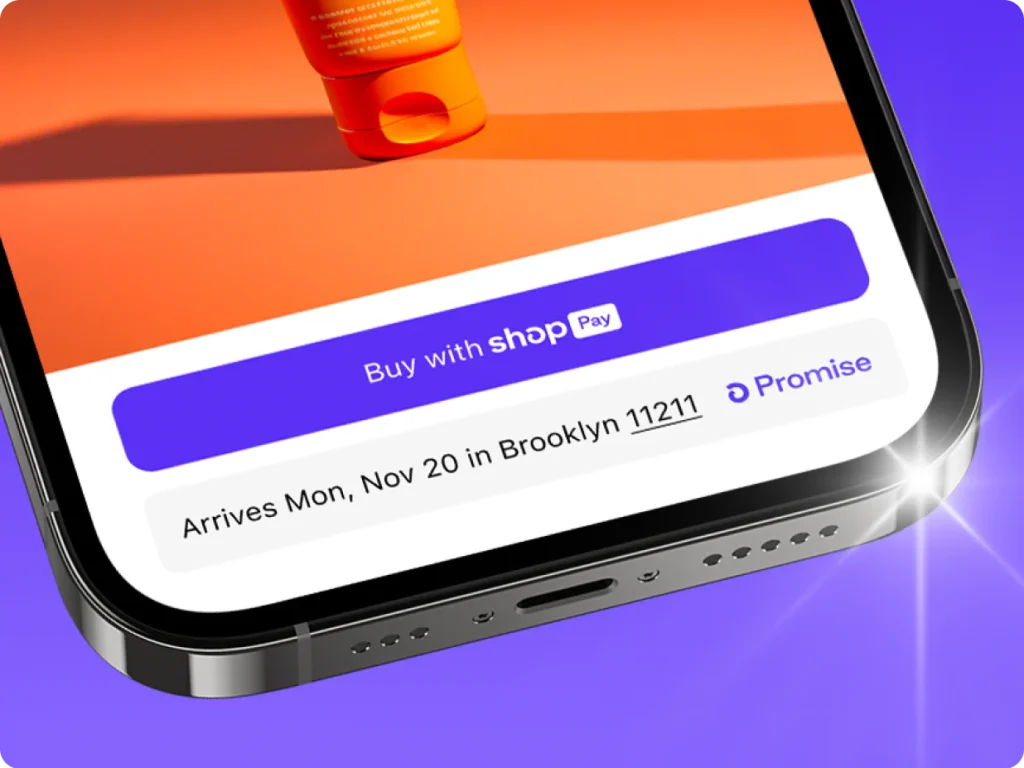
How to Add Shop Promise to Your Shopify Store
Shop Promise is a Shopify program that shows customers a guaranteed delivery date – plus a trust badge – on your product pages, at checkout, and in the Shop app.
Think of it as Shopify telling your shoppers: “This store ships fast. We back it up.”
The best part? It’s completely free for you and your customers.
So, what happens when an order is late? If a Shop Promise order arrives after the promised date, the customer gets $5 in Shop Cash to spend in the Shop app. Shopify handles this – it doesn’t come out of your pocket.
Does Your Store Qualify?

Basically, you can’t turn Shop Promise on yourself. Shopify decides who qualifies.
Shop Promise is only available to the top 1% of Shopify merchants who ship fast and reliably. When your store qualifies, Shopify sends you a notification in your admin. That’s when you can activate it.
To be considered, your store needs to check all of these boxes:
- Basic plan or higher
- Shop Pay turned on
- Active Shopify Payments account
- Shop sales channels must be added/active in your store (you don’t need to actively sell through it, but it can’t be deactivated).
- A fulfillment location inside the United States
- Up-to-date Shopify settings
- No violations of Shopify’s Acceptable Use Policy
Which Orders Won’t Show the Badge?
Even if your store qualifies, some orders are automatically excluded:
- Orders shipping outside the United States
- Out-of-stock products
- Pre-orders
- Digital products
- Local pickup or local delivery orders
- Subscription orders (after the first one)
How to Turn On/Off Shop Promise
You’ll only see this option after Shopify notifies you that you’re eligible.
- In your Shopify admin, go to Sales channels > Shop
- Click Promise
- Click Activate
- Set your default shipping rate description – or leave it blank (it defaults to “Ships in 1 business day”)
- Read and sign the Shop Promise Terms of Service
- Click Activate to confirm
That’s it. Shop Promise goes live in your store right away.
Note: The badge won’t show on every product or every order. If Shopify can’t reliably predict a delivery within 5 days, no date or badge is shown – even if Shop Promise is active.
To turn it off:
- Go to Sales channels > Shop
- Click Promise, then Manage
- Click Turn off
You can turn it back on anytime, as long as your store still meets the requirements.
Our tip: Do this before you activate
Check your shipping rate names. If any of them include a specific time frame – like “Delivers in 2–3 days” – remove it. Shop Promise already shows its own delivery date, so having two different timeframes visible at the same time confuses shoppers.
Use simple names like “Standard Shipping” or “Express” instead.
You can run both Shop Promise and automated delivery dates together at the same time. Here’s how it works:
- If an order qualifies for Shop Promise → the badge + delivery date shows
- If an order doesn’t qualify → the automated delivery date shows instead (no badge)
This way, shoppers always see some kind of delivery estimate – with or without the badge.
Automated Delivery Dates vs. Shop Promise: What’s the Difference?
These are two separate features. Here’s a quick comparison:
|
Automated Delivery Dates |
Shop Promise |
| What it shows |
A calculated delivery date |
A delivery date + trust badge |
| Requires Shop Pay? |
No |
Yes |
| Includes a delivery guarantee? |
No |
Limited guarantee for eligible orders |
| Available to all stores? |
Basic plan and up |
Eligibility requirements apply |
You can run both at the same time. If an order qualifies for Shop Promise, that badge shows first. If it doesn’t qualify, automated delivery dates take over.
Make Your Shopify Estimated Delivery Date Simpler With Synctrack
You’ve set up your store. Your products look great. But your inbox keeps filling up with the same question: “When will my order arrive?“
It’s frustrating – and it’s costing you more than you think.
Every support ticket takes time to answer. Every unanswered question is a shopper who second-guesses their purchase. And every vague shipping message – “Ships in 3–5 business days” – is a reason for someone to close the tab and buy elsewhere.
The problem isn’t your shipping speed. It’s that shoppers can’t see it.
Without a clear delivery date, shoppers hesitate. They second-guess. Then they leave and buy from a store that shows it upfront. Meanwhile, your support inbox fills up with shipping questions that eat into your time.
The fix is simple, use Synctrack: Estimated Delivery Date ETA.

Synctrack EDD is an app that automatically shows customers their expected delivery date – on product pages, in the cart, at checkout, and in order confirmation emails.
No more guessing. No more support tickets asking when an order will arrive. Here’s what you get:
- Delivery dates everywhere – product pages, cart, checkout, Thank You page, Order Status page, and order confirmation emails
- Smart rules – set different estimates by shipping method, country, state, city, zip code, product, or collection
- Cutoff time support – set your order cutoff time and working days so estimates are always accurate
- Holiday settings – block out days your warehouse is closed so no wrong dates are shown
- Shopify Plus checkout – show delivery estimates directly inside checkout based on the shipping method selected
- Built-in analytics – measure how your delivery messaging impacts conversion, with breakdowns by rule and time period.
- Multi-language and market localization – translate delivery messages by market so international shoppers see estimates in their own language.
- Theme compatibility – tested with 20+ popular Shopify themes, including Dawn, Impulse, Prestige, and Symmetry.
It’s a good fit for stores with multiple products, multiple shipping zones, or customers who need a delivery date before they’ll commit to buying.
Final Thoughts
Setting up a Shopify estimated delivery date is one of the most effective things you can do to improve shopper confidence and reduce post-purchase anxiety. Whether you’re using Shopify’s native features, a custom code snippet, or a dedicated Shopify EDD app, the key is accuracy – show a realistic range and make sure your operations can back it up.
Start with Shopify’s native settings if you’re on a standard plan and want quick wins at checkout. Add theme-level code or an app when you need product-page and cart-level EDD. And if you’re on Shopify Plus, look for apps that offer checkout UI extensions to give shoppers delivery clarity at every step of the funnel. Good luck!